How to Connect Your Guesty Account
Guesty is a property management platform for short-term and vacation rentals. Our integration enables Guesty customers to connect their account and automatically create Locations from their existing properties.
Benefits of the Guesty Integration
- Automatic Location Setup: Create Locations directly from the properties you have set up in Guesty
- Flexible Property Sync: Choose to sync all properties, only specific ones, or none at all
- Nightly Sync: Property information stays up to date automatically every night
- Secure API Connection: Uses a dedicated Client ID and Client Secret issued by Guesty for a secure, non-marketplace connection
Step-by-Step Setup Instructions
Part 1: Create a Client ID and Client Secret
1. Generate Your Credentials in Guesty
- Log in to your Guesty dashboard
- Follow Guesty's guide to upgrading third-party access
- Look for the section called "Creating a New Access Token for Non-Marketplace Apps"
- Follow the steps there to generate your Client ID and Client Secret
Note: Keep your Client Secret somewhere safe — Guesty will only display it once.
Part 2: Connect to Your Porter Dashboard
1. Access Integration Settings
- Navigate to your Porter Dashboard
- Select Account from the main menu
- Click on Integrations
2. Add the Guesty Integration
- Click the "+" button to create a new integration
- Select Guesty
3. Enter Your Credentials
- Expand Connection configuration
- Paste in your Client ID and Client Secret from Guesty
- Both fields can also be found in Guesty under Integrations > API & Webhooks
4. Connect to Guesty
- Click "Connect to Guesty"
- Wait for the initial sync to complete
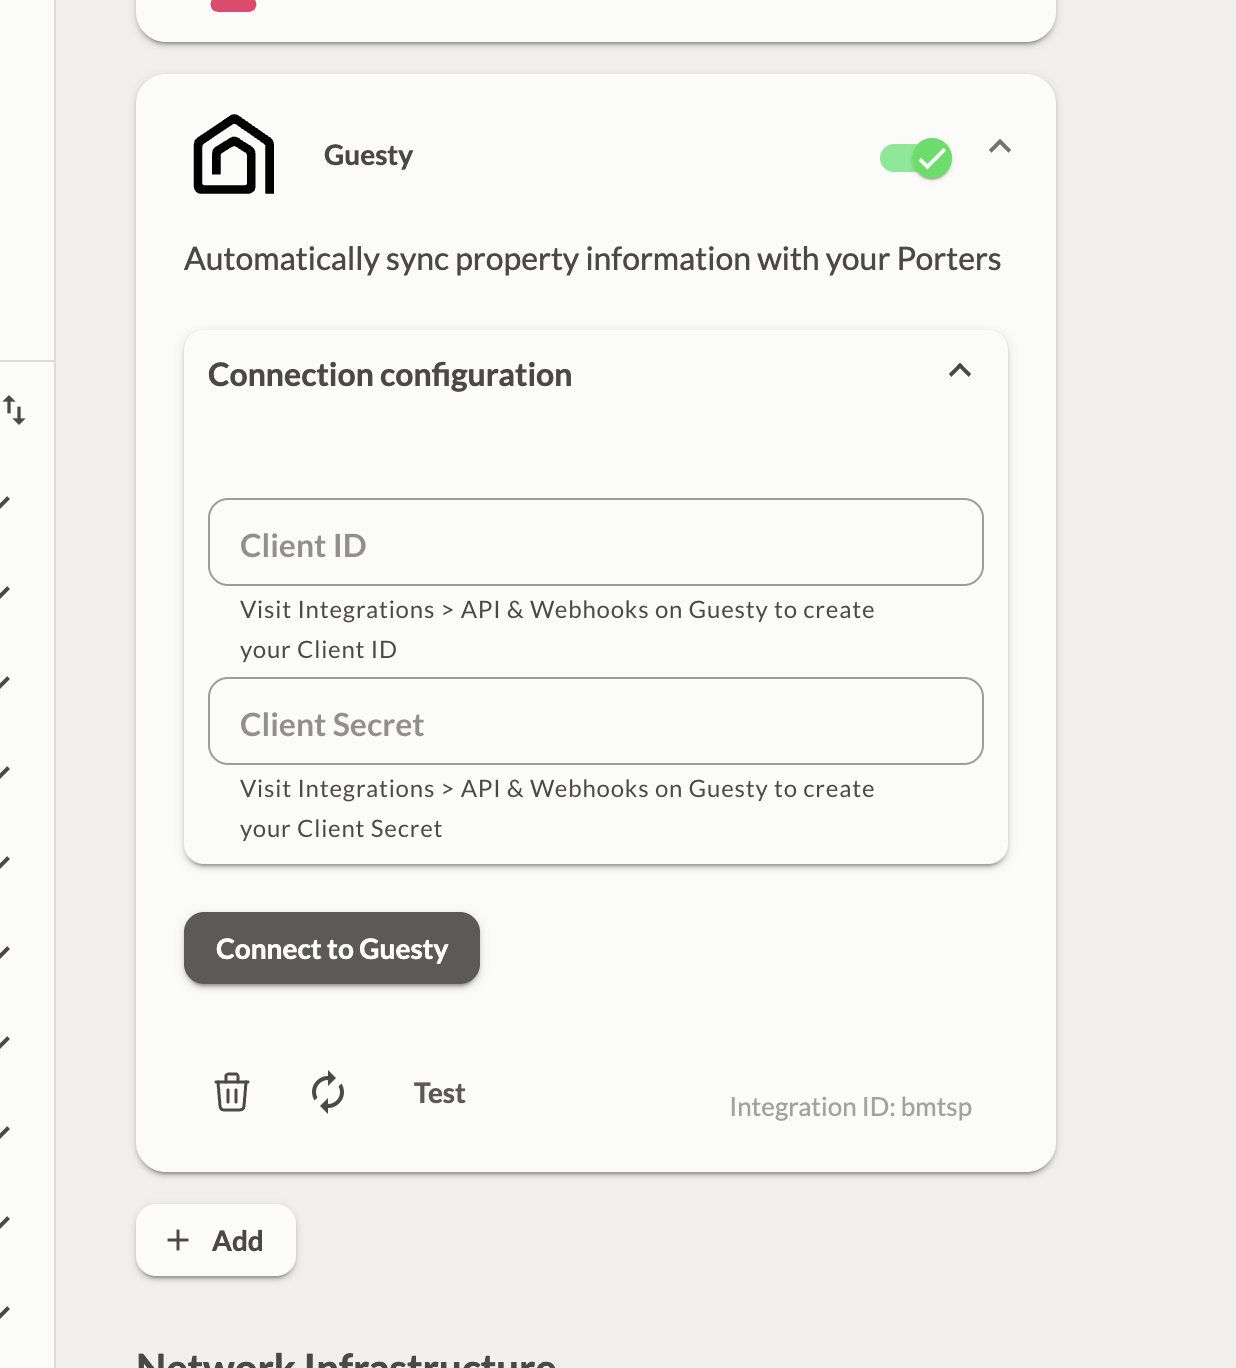
Screenshot: Example of where to paste your Client ID and Client Secret
Part 3: Choose How Locations Are Created
Once your account is connected and the initial sync completes, a "Create Locations for" menu appears in the Connection configuration panel. This controls which Guesty properties automatically become Locations.
1. Open the Menu
- In the integration, open Connection configuration
- Click the "Create Locations for" dropdown
2. Select a Mode
- All properties: Automatically create a Location for every property in Guesty
- Specified properties: Only create Locations for the properties you check off in the list
- All but excluded properties: Create Locations for every property except the ones you check off
- None of the properties: Don't automatically create any Locations
Important: If you already have Locations set up, choose "None of the properties" to avoid creating duplicates, then link your existing Locations manually (see below).
3. Pick Individual Properties (If Applicable)
- If you chose Specified properties or All but excluded properties, click the properties button below the dropdown to expand the list
- Check the box next to each property you want to include or exclude
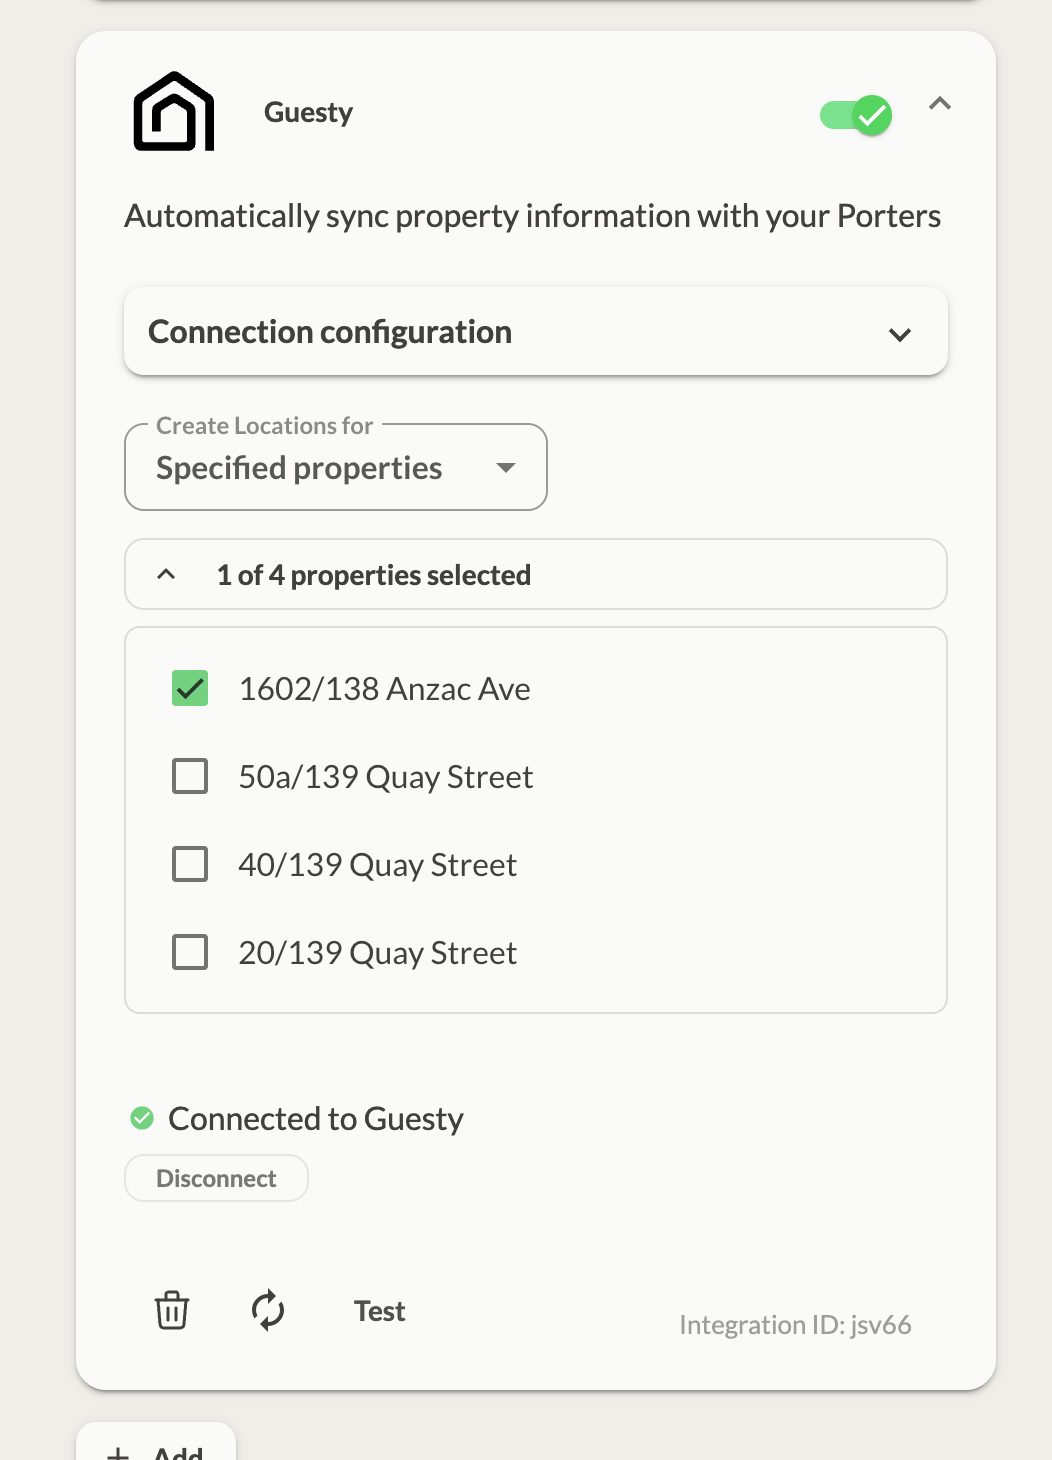
Screenshot: Selecting individual properties under "Create Locations for"
Part 4: Link Existing Locations (If Applicable)
If you set "Create Locations for" to None of the properties because you already have Locations:
- Navigate to each Location's Info section
- At the top of the page, find the Integrations section
- Select the corresponding Guesty property from the dropdown menu
- Repeat for all Locations
What Happens After Setup
✅ Automatic Nightly Sync
Once connected, your integration will automatically sync every night:
- Property information updates automatically
- Changes are reflected in your Porter Dashboard
Troubleshooting Tips
| Issue | Solution |
|---|---|
| Connection Failed | Double-check that your Client ID and Client Secret were copied exactly, with no extra spaces |
| Invalid Credentials | Confirm the token was created using the "Non-Marketplace Apps" process linked above, not a marketplace app token |
| Client Secret Lost | Guesty only displays the Client Secret once; if lost, generate a new Client ID and Client Secret in Guesty and reconnect |
| Sync Issues | If data isn't appearing, try using the Test or Sync buttons in the integration |
| Missing Properties | Ensure all properties are active in your Guesty account |
| Property List Is Empty | The property picker only populates after the integration has synced at least once — wait for the initial sync to finish, or click Sync |
Need Additional Help?
If you encounter any issues during setup or have questions about the Guesty integration, please contact our support team (info@tenonedesign.com) with details about your specific situation.
Was this article helpful?
That’s Great!
Thank you for your feedback
Sorry! We couldn't be helpful
Thank you for your feedback
Feedback sent
We appreciate your effort and will try to fix the article