How to Connect Your Track Account
Track is a property management system that allows you to manage properties and reservations. Our integration enables Track customers to import and sync their property information into our system, providing automatic Location setup and Wi-Fi network configuration.
Benefits of the Track Integration
- Automatic Location Setup: Import all your properties as Locations
- Greet guests by name: Reservation info is synced
- Wi-Fi Network Sync: Automatically sync Wi-Fi information from Track
- Nightly Updates: Changes sync automatically every night
Step-by-Step Setup Instructions
Part 1: Obtaining Track API Credentials
1. Access Configuration in Track
- Navigate to your Track dashboard
- Go to the Configuration page

Screenshot: Configuration page in Track showing the Company Setup tab
2. Navigate to API Keys
- From the Company Setup tab, click API Keys
3. Create a New Server Key
- On the API Keys page, click + Server Key
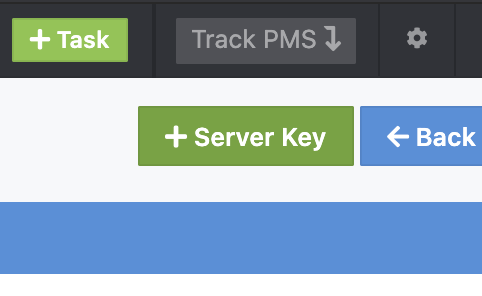
Screenshot: API Keys page showing the + Server Key button
4. Name and Save the Key
- Enter "Porter Integration" as the Name
- Ensure Is Active is checked
- Click Save Key
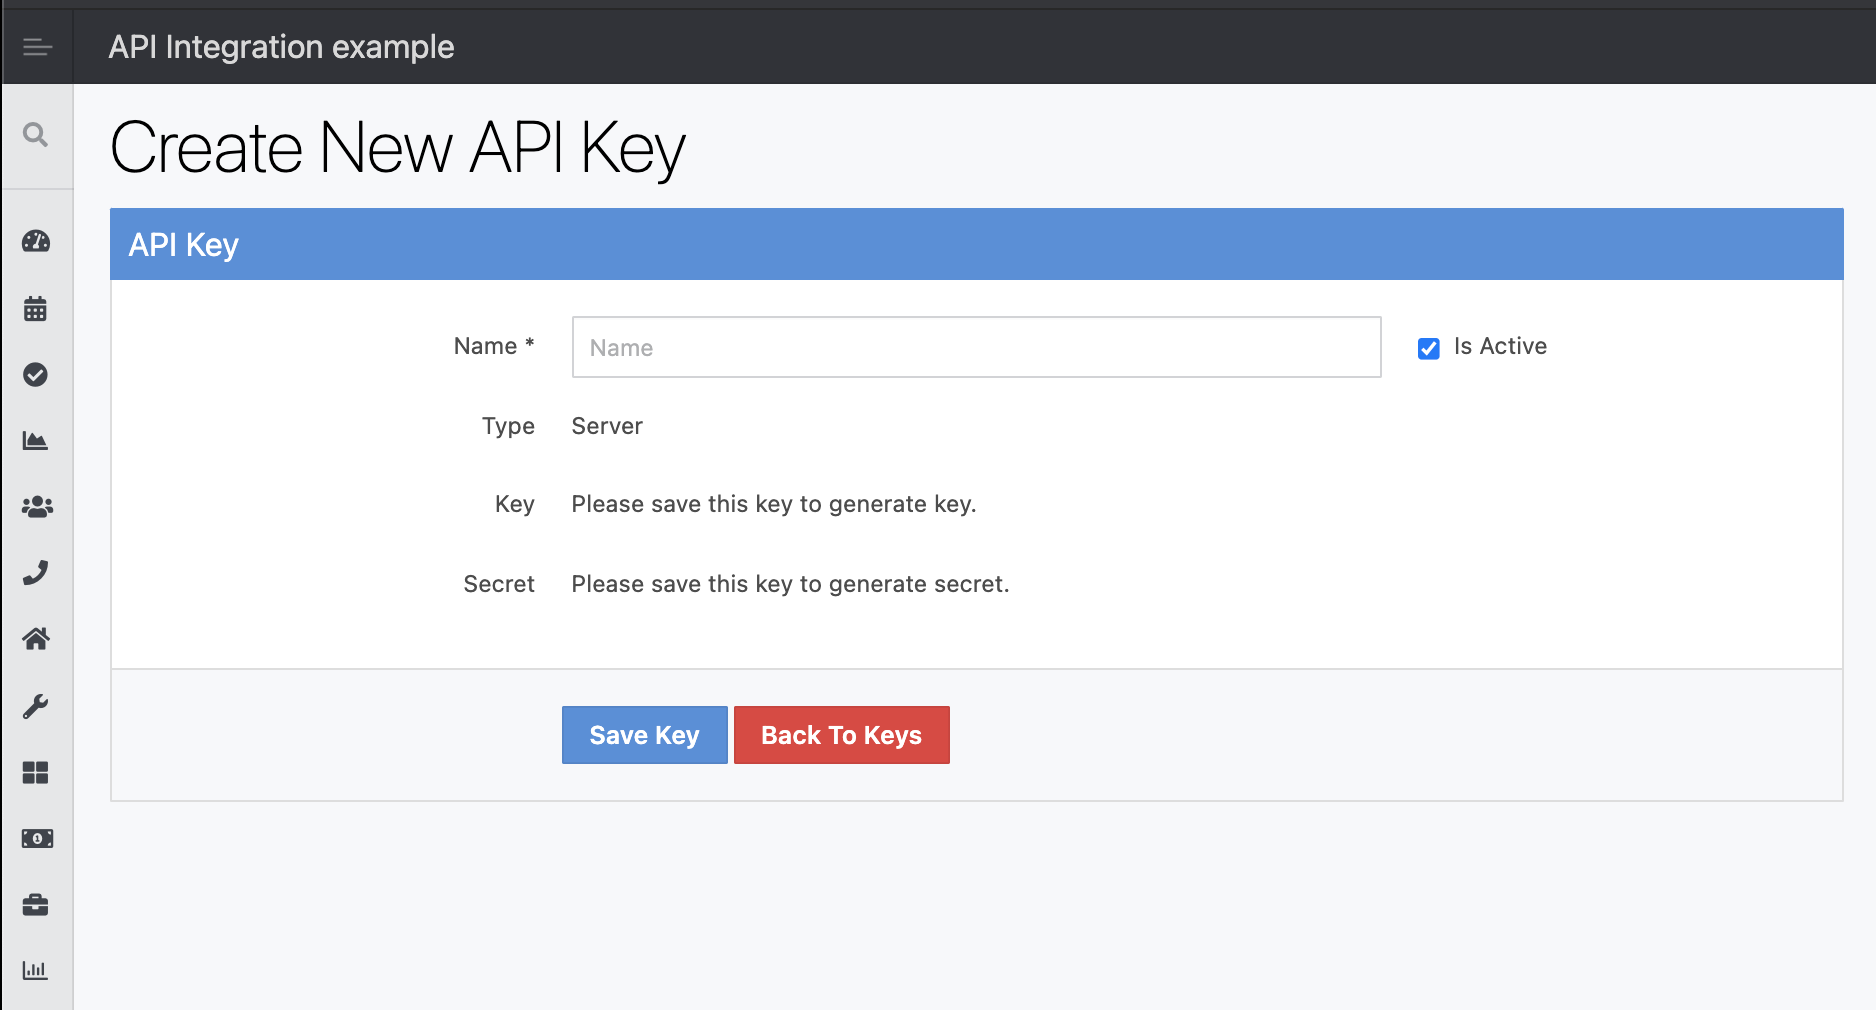
Screenshot: Create New API Key form
5. Copy Your Credentials
After saving, you'll need to copy three pieces of information:
- Server Key: The Key value from the API key page
- Server Secret: The Secret value from the API key page
- Track Subdomain: Your Track subdomain (e.g., if your track domain is https://bradford.trackhs.com, use bradford)
Important: Keep this page open so you can copy and paste into the Porter Dashboard.
Part 2: Porter Dashboard Setup
1. Access Integration Settings
- Navigate to your Porter Dashboard
- Select Account from the main menu
- Click on Integrations
2. Add Property Management Integration
- Under the Property Management section, click the Add button
- Select Track from the available options
Screenshot: Example of the Integrations section under Account
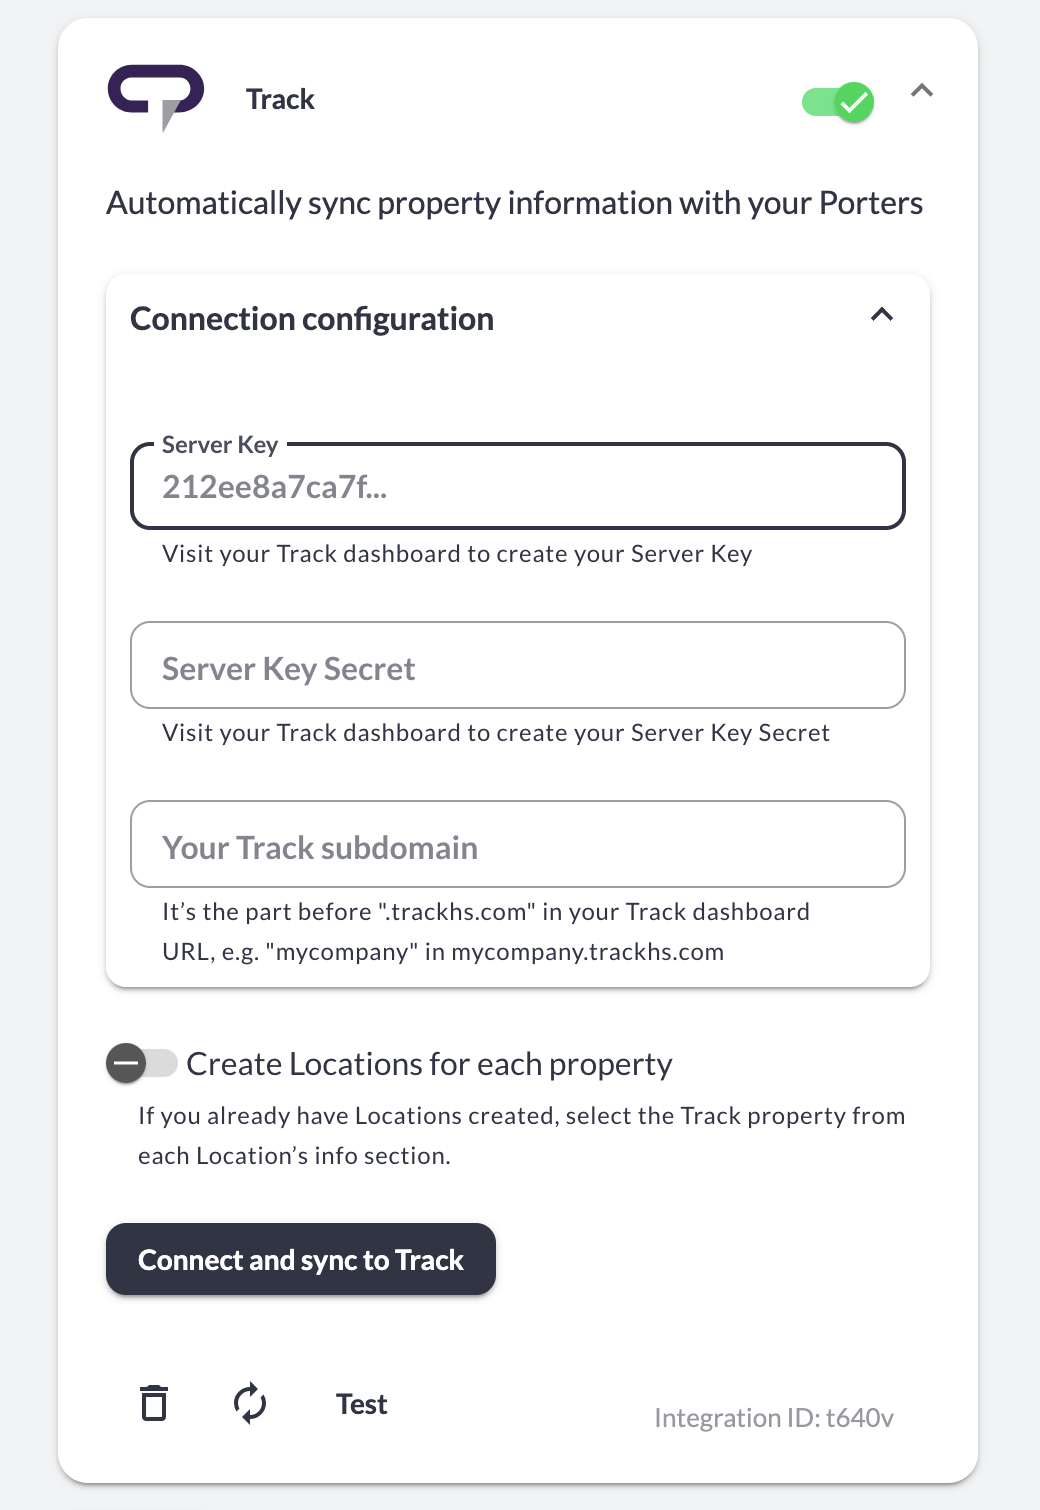
3. Enter Track Credentials
- Paste your Server Key into the appropriate field
- Paste your Server Secret into the appropriate field
- Enter your Track subdomain
4. Configure Location Creation
⚠️ Important: Before performing the initial sync, decide how you want to handle Locations:
- If you haven't created Locations yet: Leave "Create Locations for each property" turned on
- If you already have Locations set up: Turn off "Create Locations for each property"
5. Connect and Sync
- Click Connect and sync with Track
- Wait for the initial sync to complete
6. Link Existing Locations (If Applicable)
If you turned off automatic Location creation because you already have Locations:
- Navigate to each Location's Info section
- At the top of the page, find the Integrations section
- Select the corresponding Track property from the dropdown menu
- Repeat for all Locations

Screenshot: Example of the Integrations picker at the top of the Location Info section
What Happens After Setup
✅ Automatic Nightly Sync
Once connected, your integration will automatically sync every night:
- Property information updates automatically
- Wi-Fi network configurations sync from Track
- Changes are reflected in your Porter Dashboard
✅ Wi-Fi Information
- Wi-Fi network details from Track are automatically imported
- Network information is associated with the corresponding Locations
Troubleshooting Tips
| Issue | Solution |
|---|---|
| Connection Failed | Verify that your Server Key, Server Secret, and Track URL are correct. Ensure the API key is marked as Active in Track |
| Sync Issues | Wait for the nightly sync to complete, or try disconnecting and reconnecting the integration |
| Missing Properties | Ensure all properties are active in your Track account and the initial sync has completed |
| Wi-Fi Not Syncing | Check that Wi-Fi information is properly configured in Track for each property |
Need Additional Help?
If you encounter any issues during setup or have questions about the integration, please contact our support team (info@tenonedesign.com) with details about your specific situation.
Was this article helpful?
That’s Great!
Thank you for your feedback
Sorry! We couldn't be helpful
Thank you for your feedback
Feedback sent
We appreciate your effort and will try to fix the article