Cloud Mode Setup
This guide walks through setting up a Wifi Porter or Porter Hospitality device in cloud-managed mode — linked to a Location in your PHN account, with Wi-Fi info and branding you can update remotely at any time. If you're not sure this is the right mode for you, see Local or Cloud: Choosing How to Set Up Your Wifi Porter first.
Step-by-Step Setup Instructions
1. Open the Porter Setup App and Tap "Get Started"
- Hold your phone against the Porter when prompted to read it for the first time
2. Choose the Cloud Option
- Select "With Optional Marketing Add-on" (or "Add to a Location" if you're already signed in and subscribed)
3. Sign In or Create a Free Account
- You'll be prompted to sign in if you aren't already
4. Choose a Plan
- Pick a billing period (monthly or annual) and the number of PHN devices you want included, then tap Select
5. Enter Payment Details
- Name, email, and card information for the subscription
6. Plan Created
- You'll see a confirmation that your plan is set up, along with a reminder that you can fine-tune everything later from portersetup.com/dashboard. Tap Continue
7. Add the Porter to a Location
- A Location holds all the settings — Wi-Fi info, branding, and guest features — that any Porter assigned to it will share
- Tap "Create a new Location," or pick an existing one if you have one already
8. Name the Location
- Give it a name that identifies the property (e.g. "Portland Location"), then tap "Create Location"
9. Enter the Location's Wi-Fi Info
- Same fields as local mode: network name, password, security type, and whether it's hidden
- This is stored with the Location, not the physical device
10. Set Up a Title or Greeting
- This is the welcome text guests see on the landing page when they join — for example "Welcome!" plus an optional subtitle
11. Program the Porter
- Tap Start on the "Program Porter" screen, then hold your phone against the Porter when prompted to scan
- Cloud-mode Porters are written with a signed link to the Location rather than raw Wi-Fi credentials
12. Print, Share, or Email the QR Code
- Same as local mode — if you don't have a printer handy, use Email or Share instead of closing the app
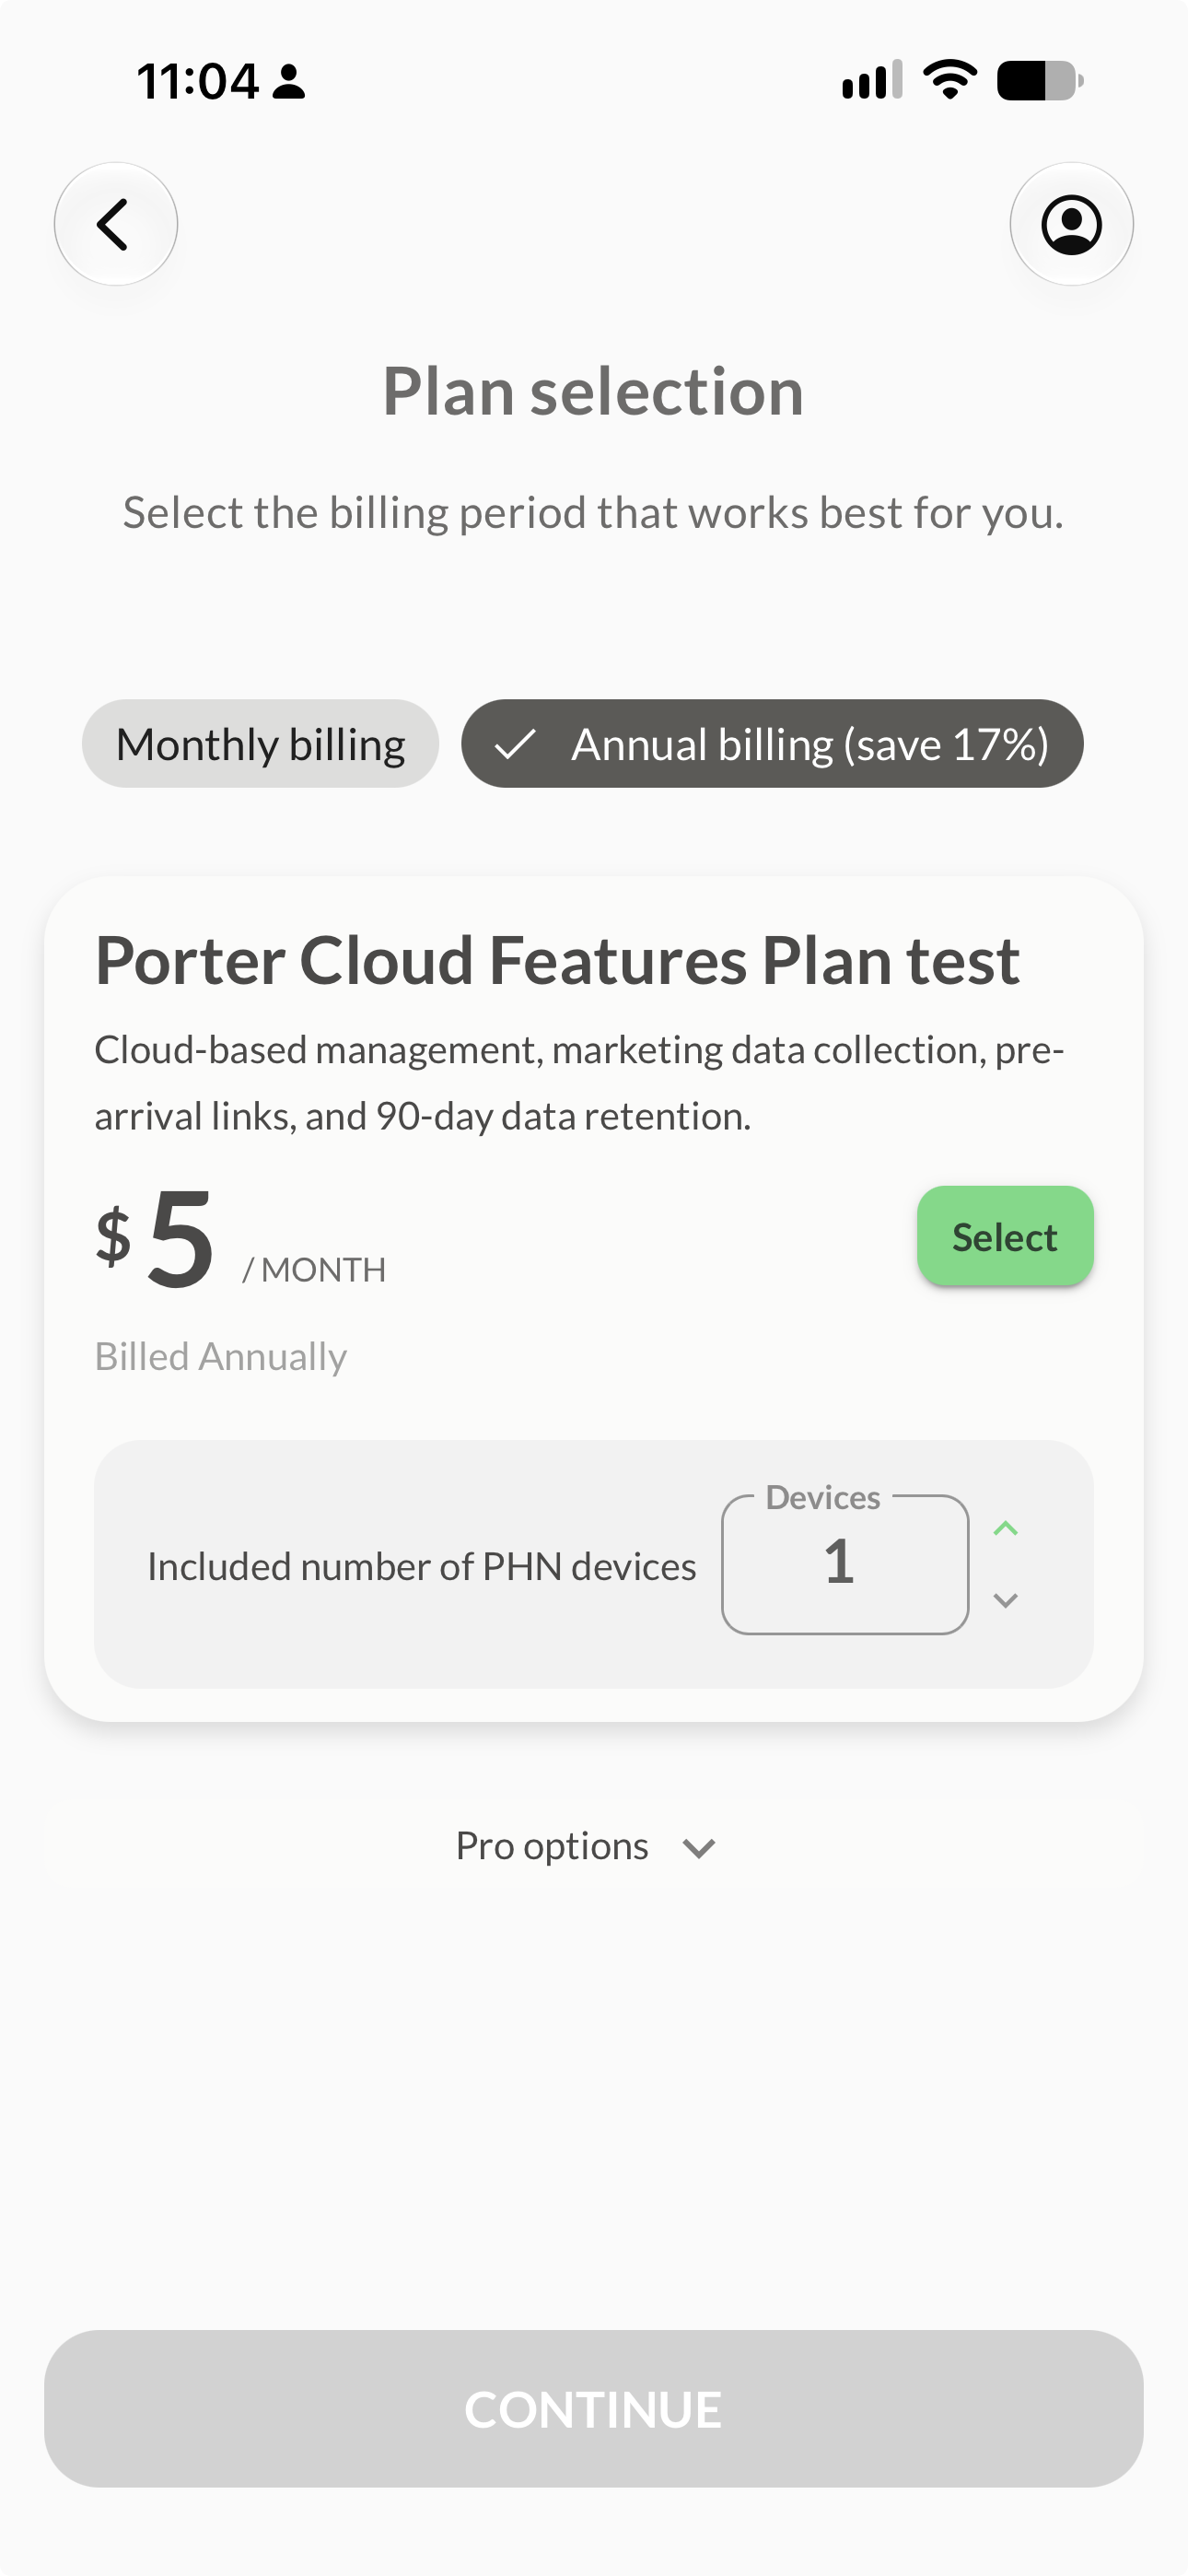
Screenshot: Step 4 — plan selection (billing period and device count)
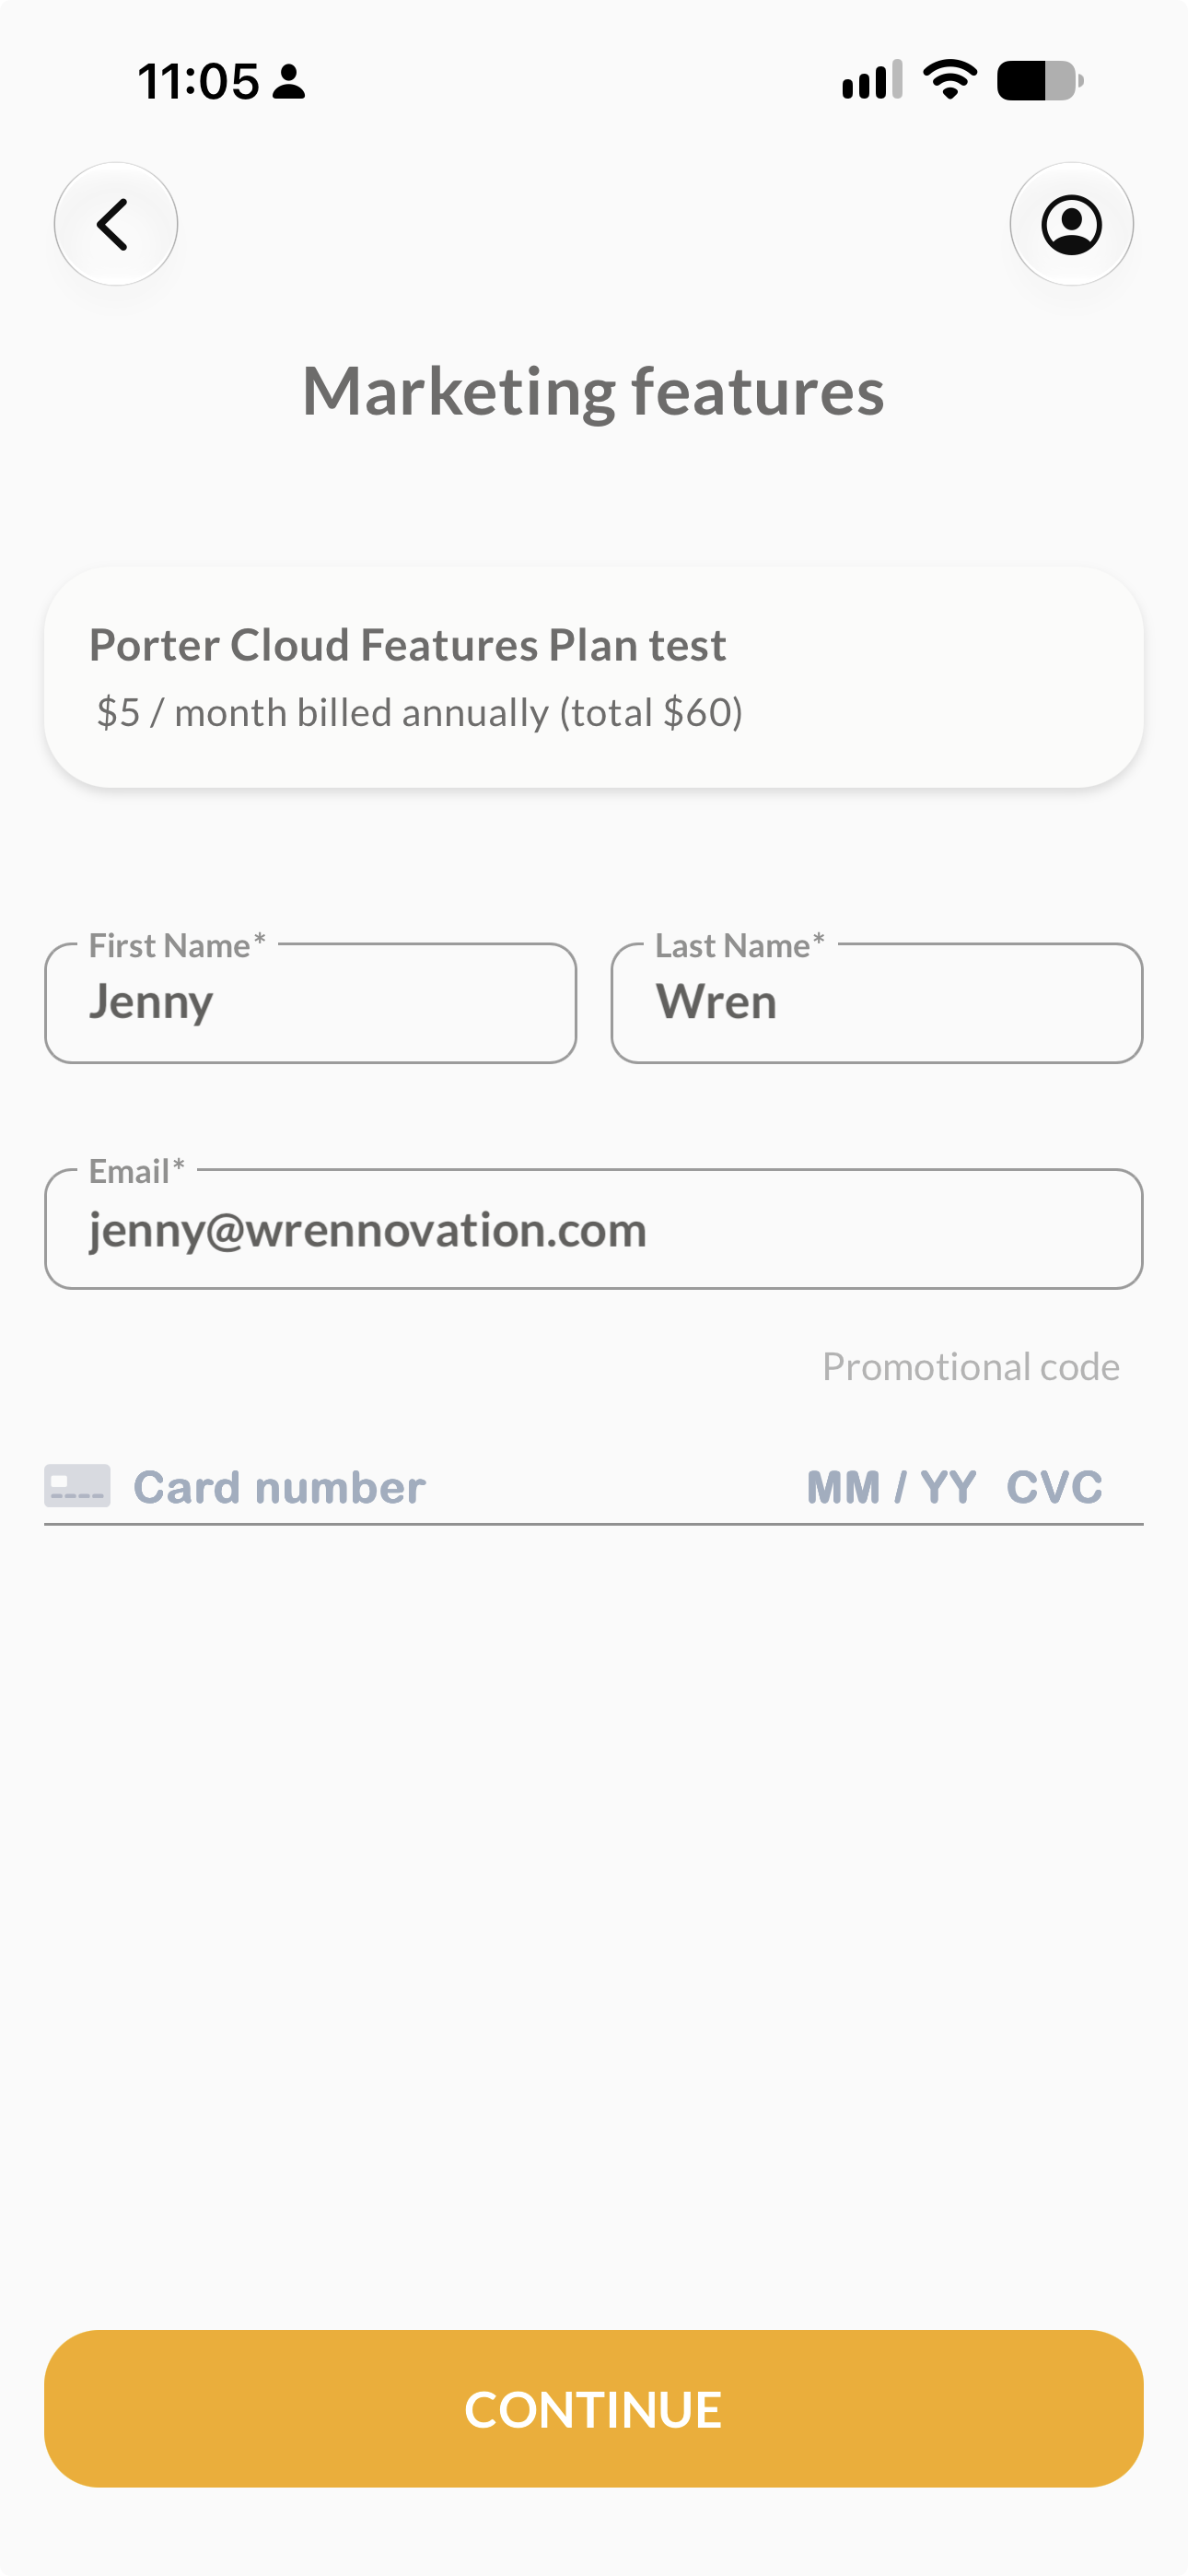
Screenshot: Step 5 — entering payment details
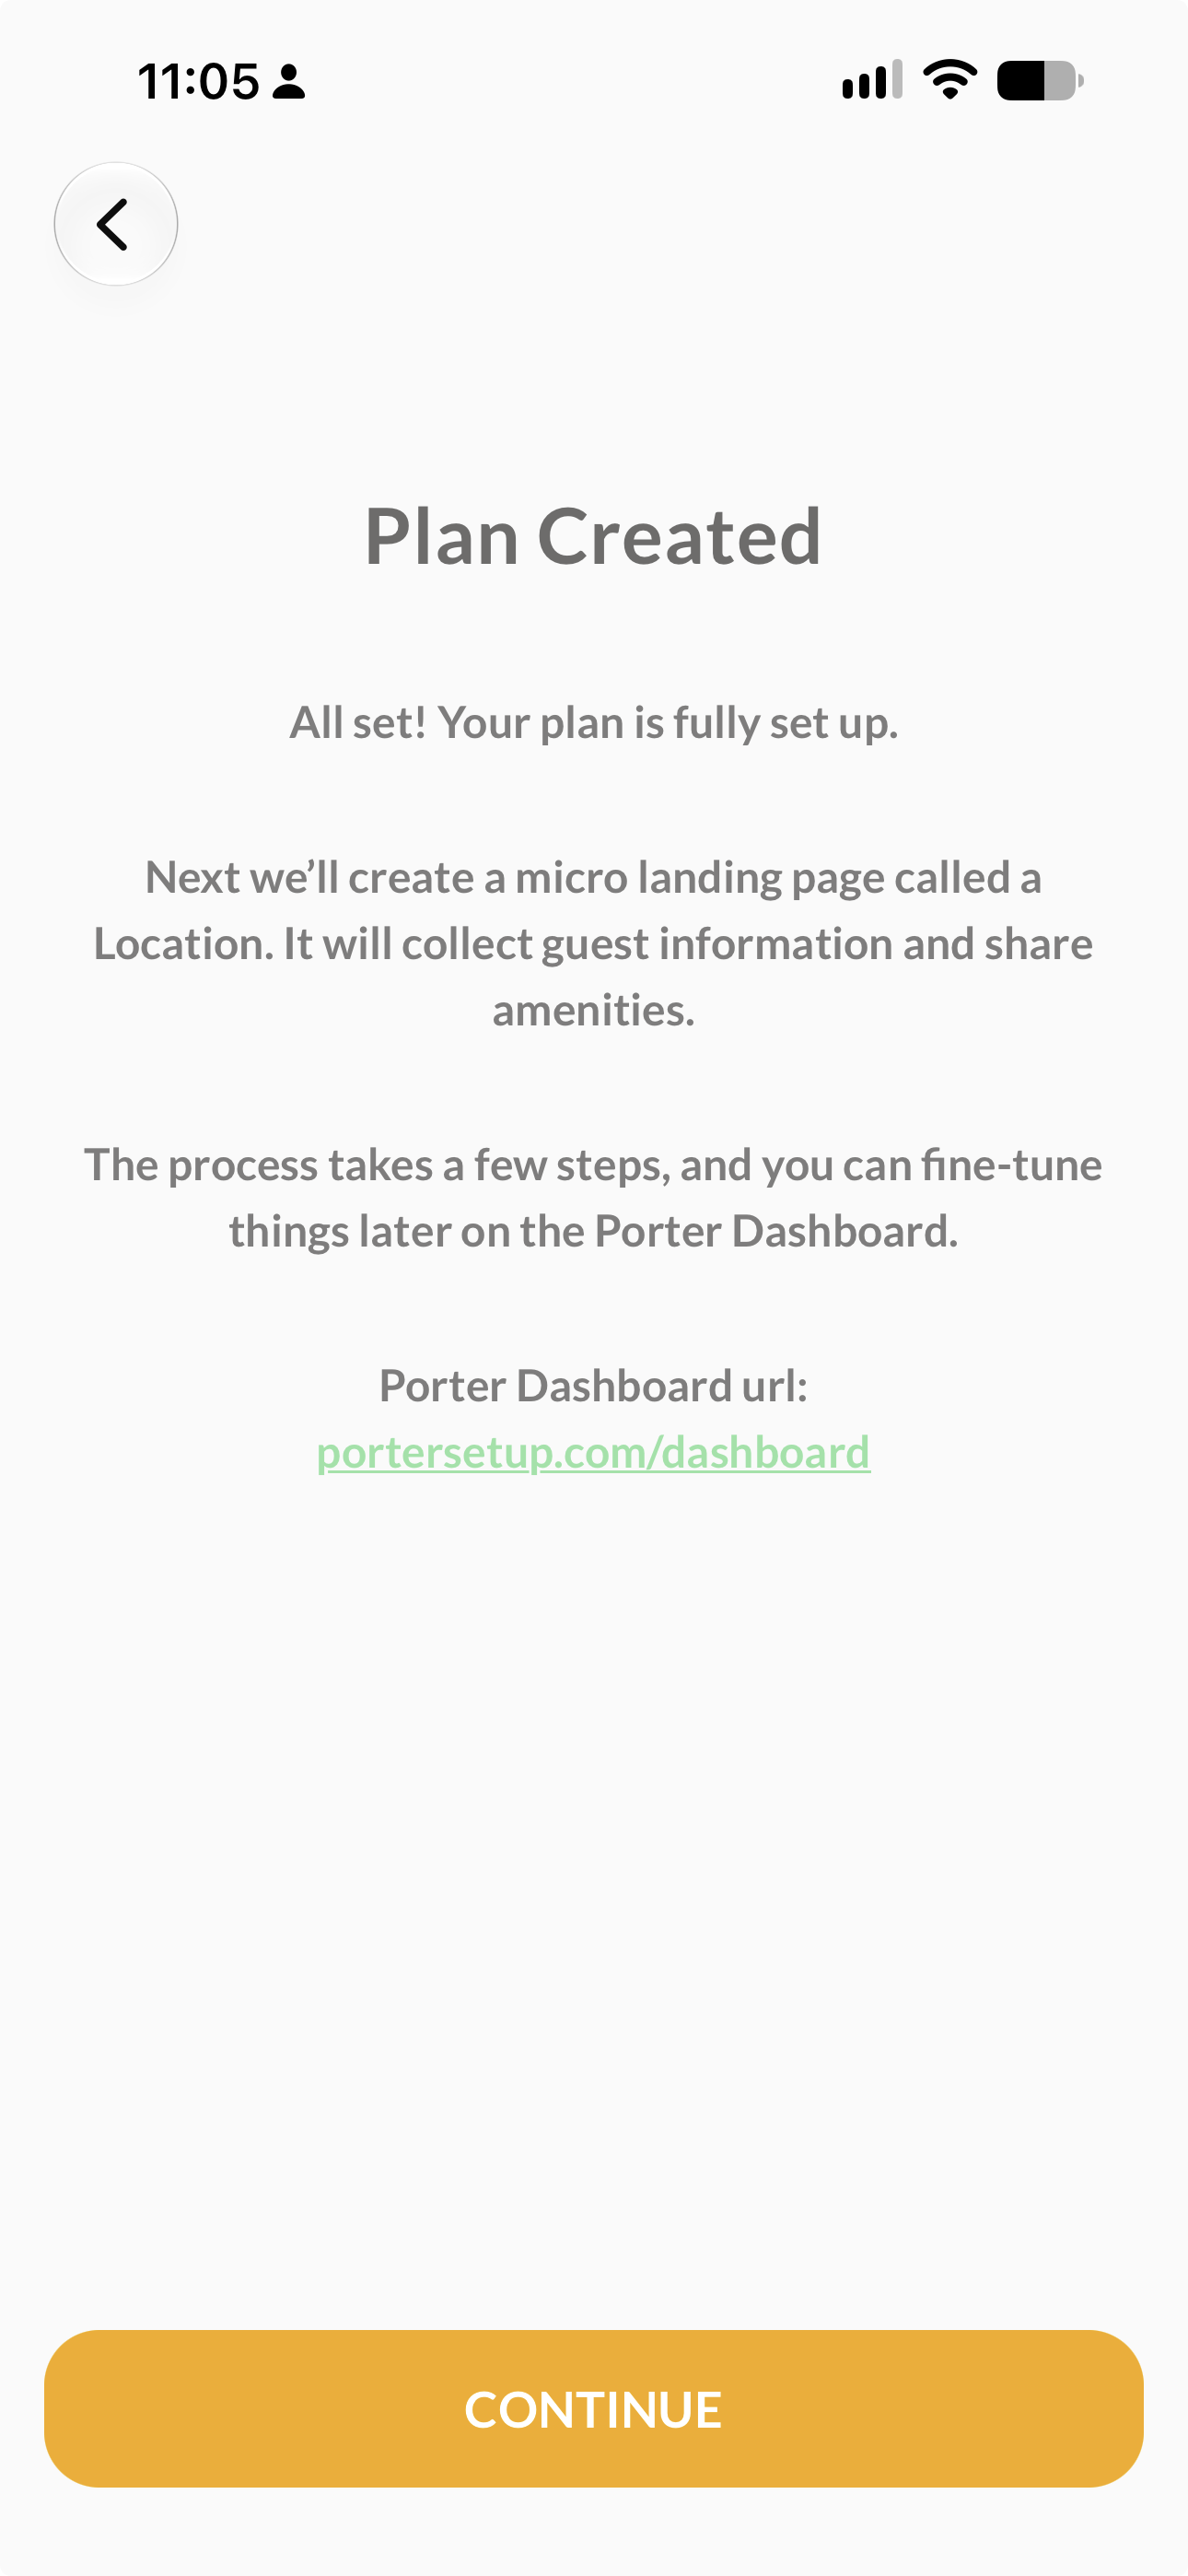
Screenshot: Step 6 — "Plan Created" confirmation
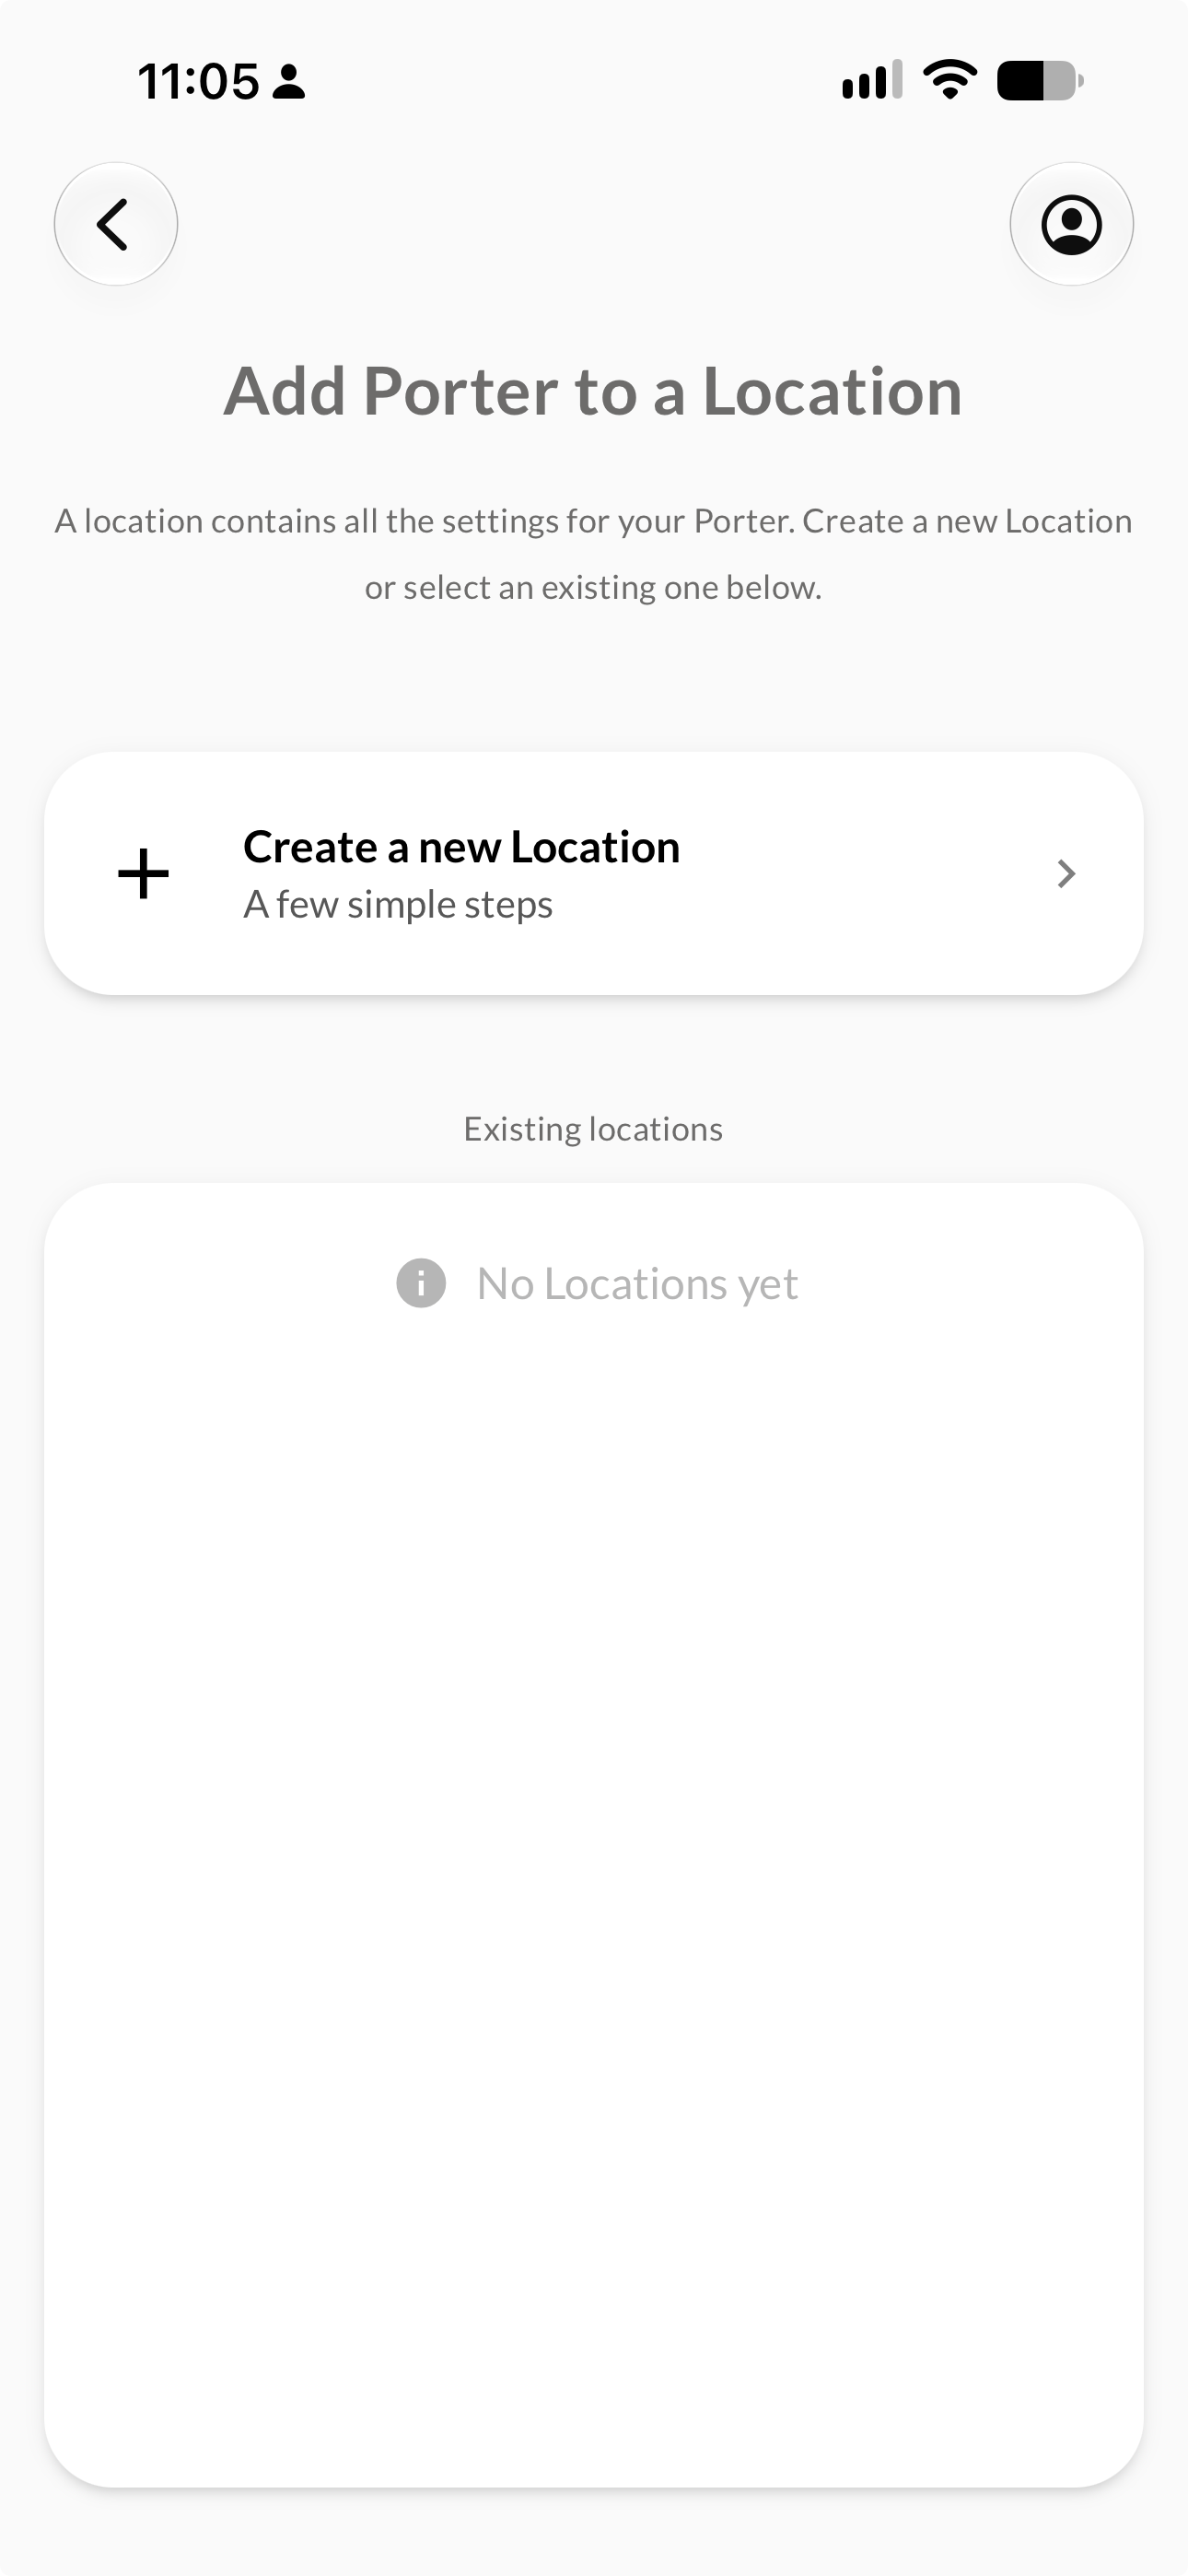
Screenshot: Step 7 — adding the Porter to a Location
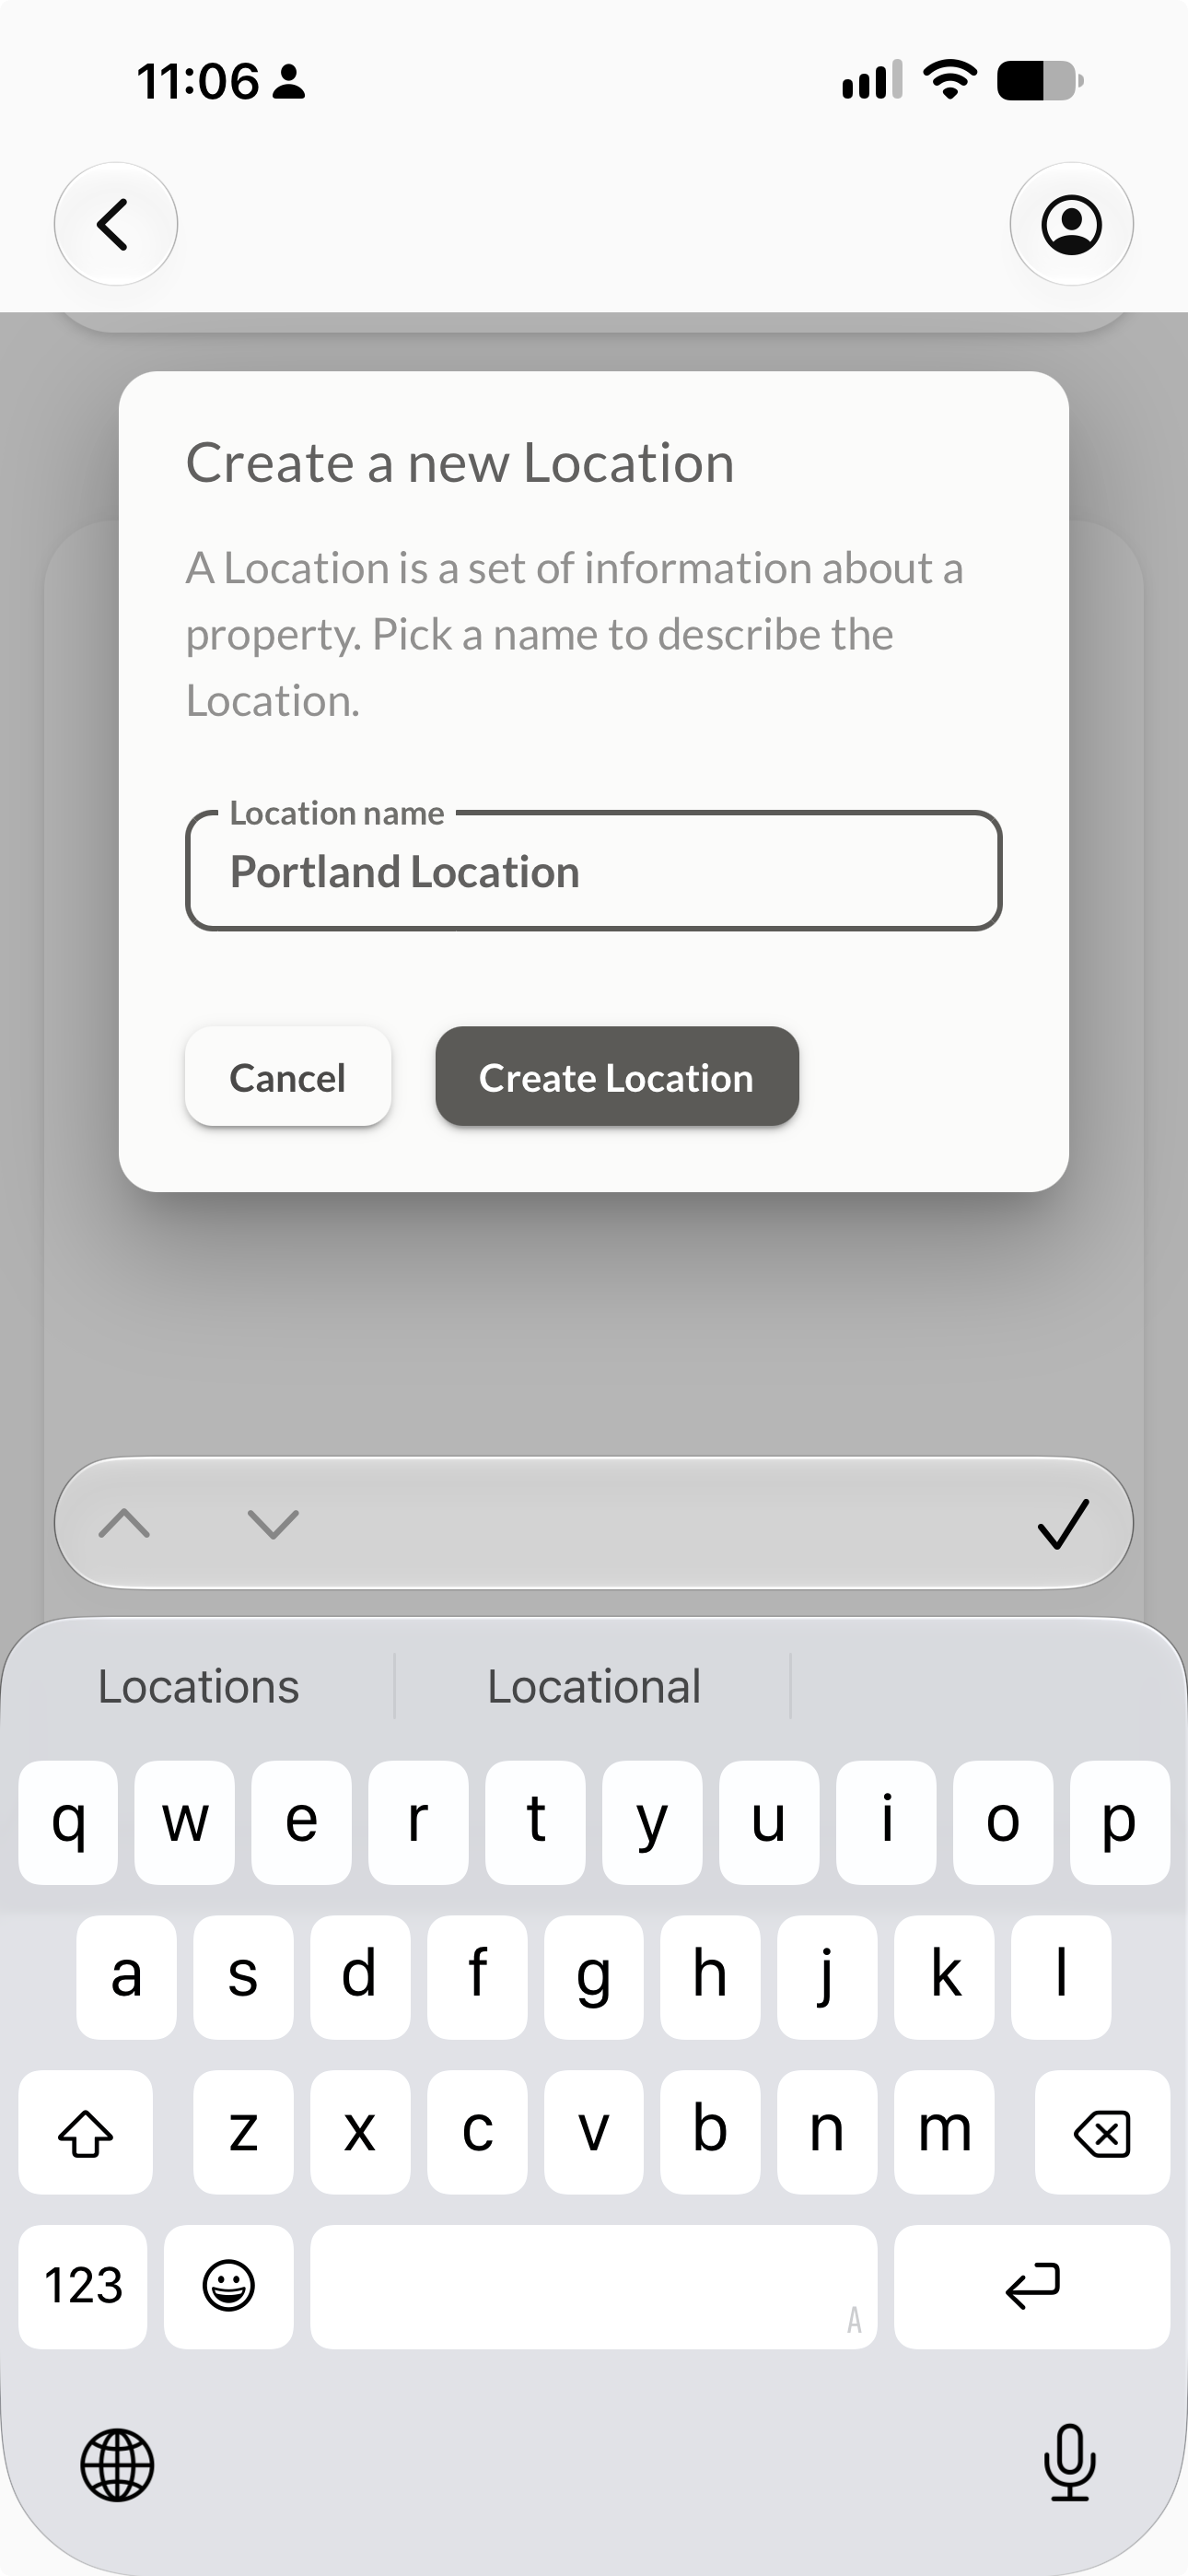
Screenshot: Step 8 — naming a new Location
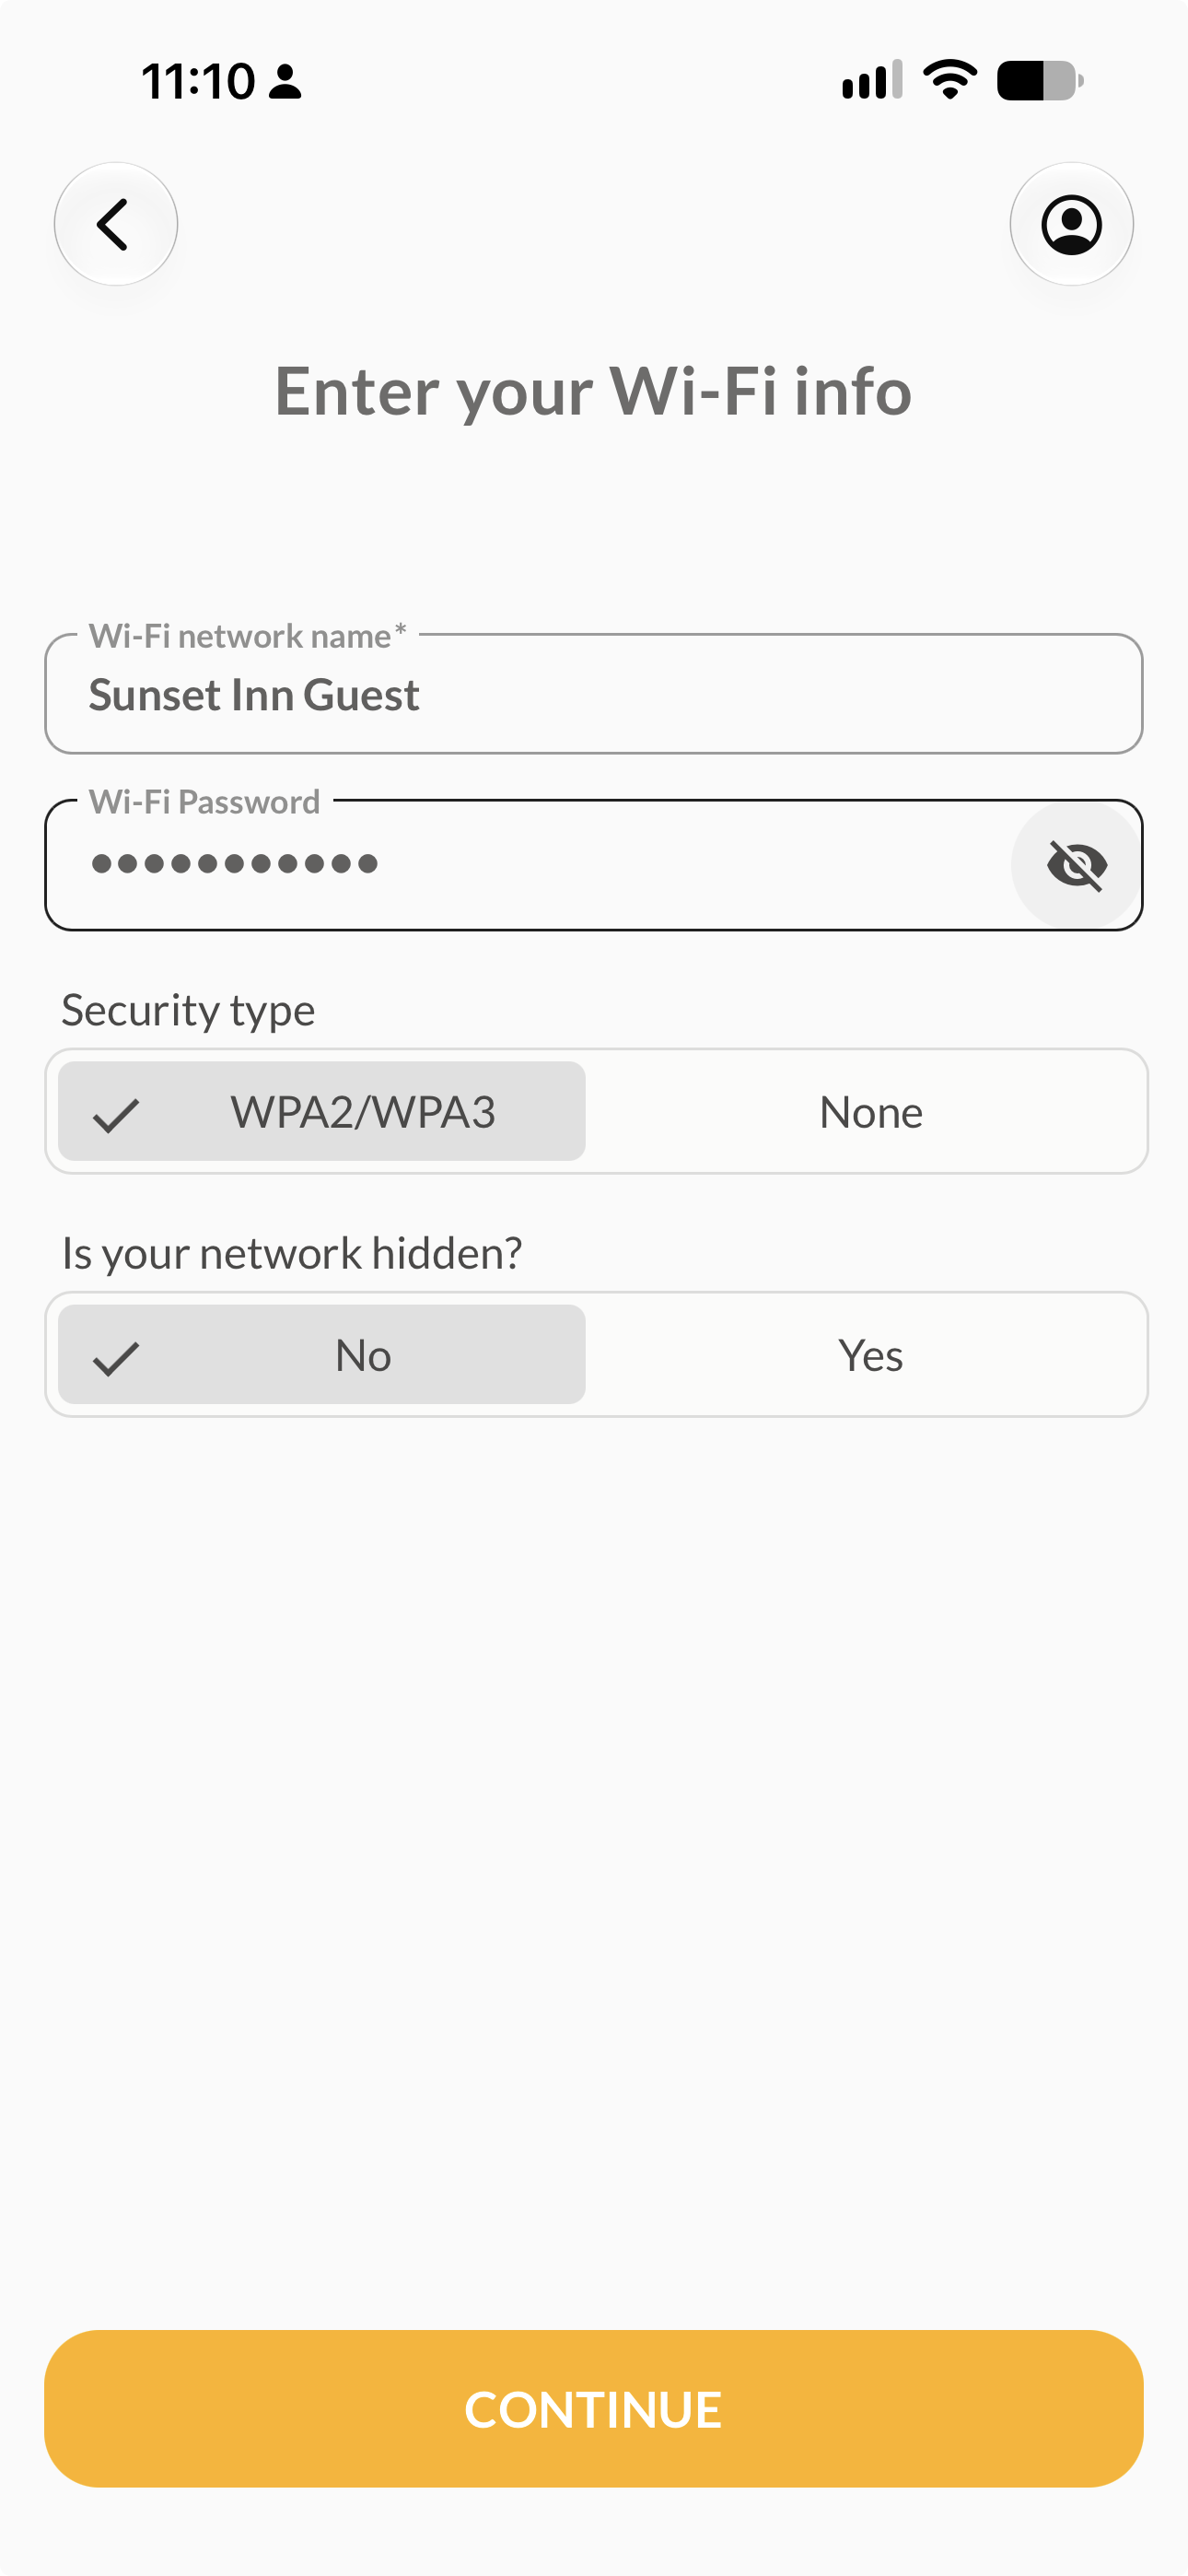
Screenshot: Step 9 — entering the Location's Wi-Fi info
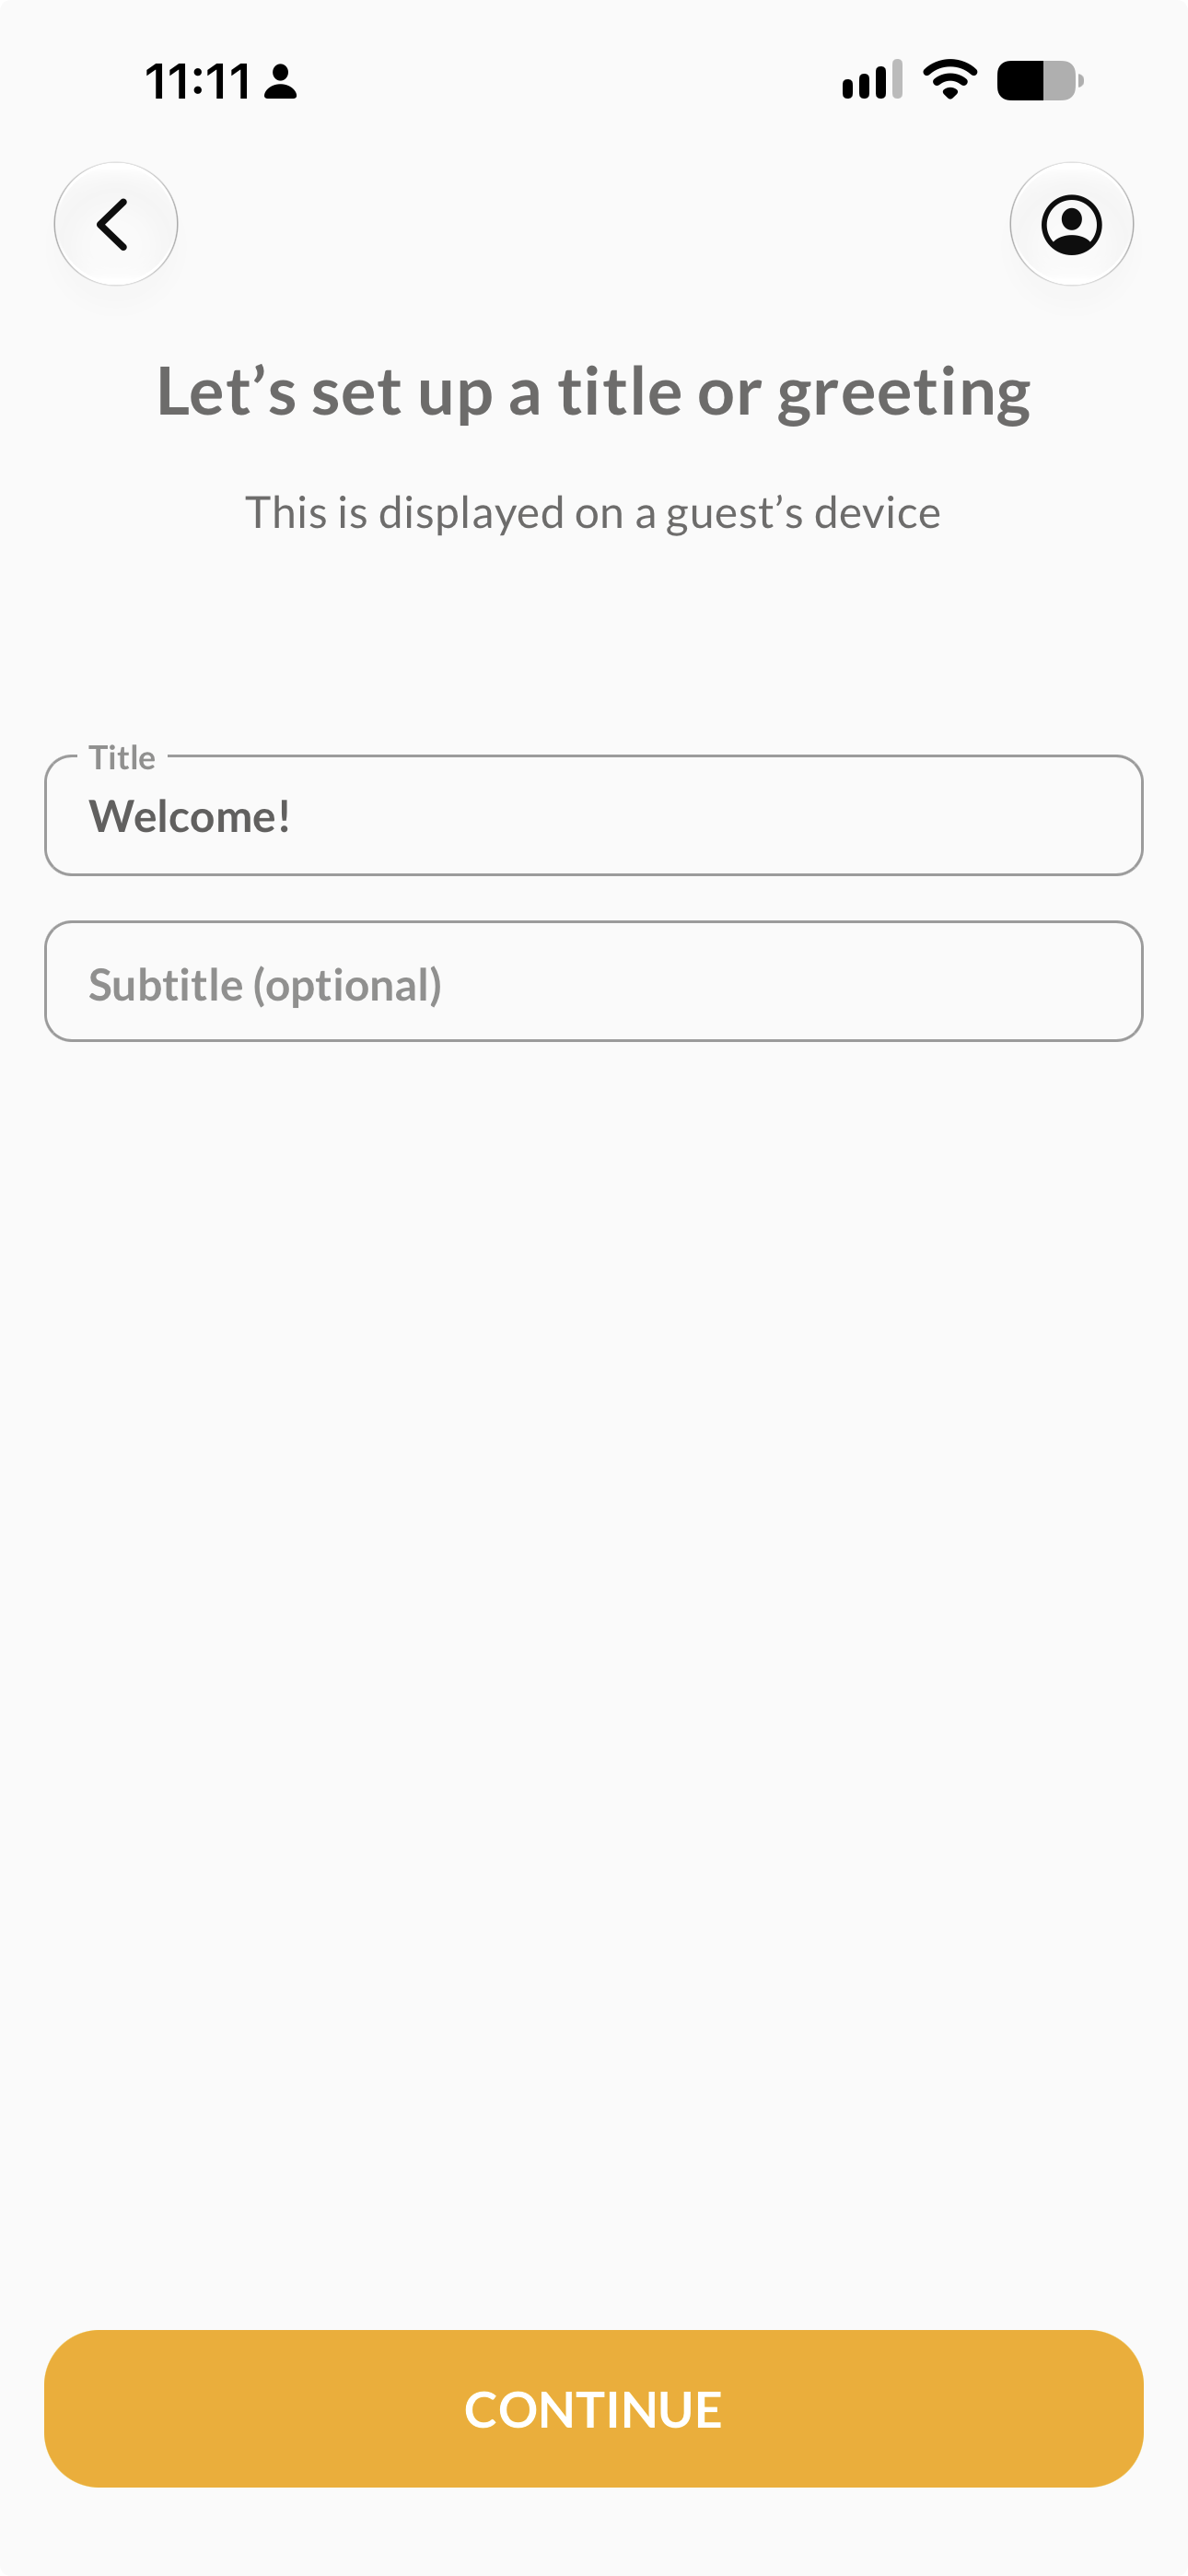
Screenshot: Step 10 — setting up a title or greeting
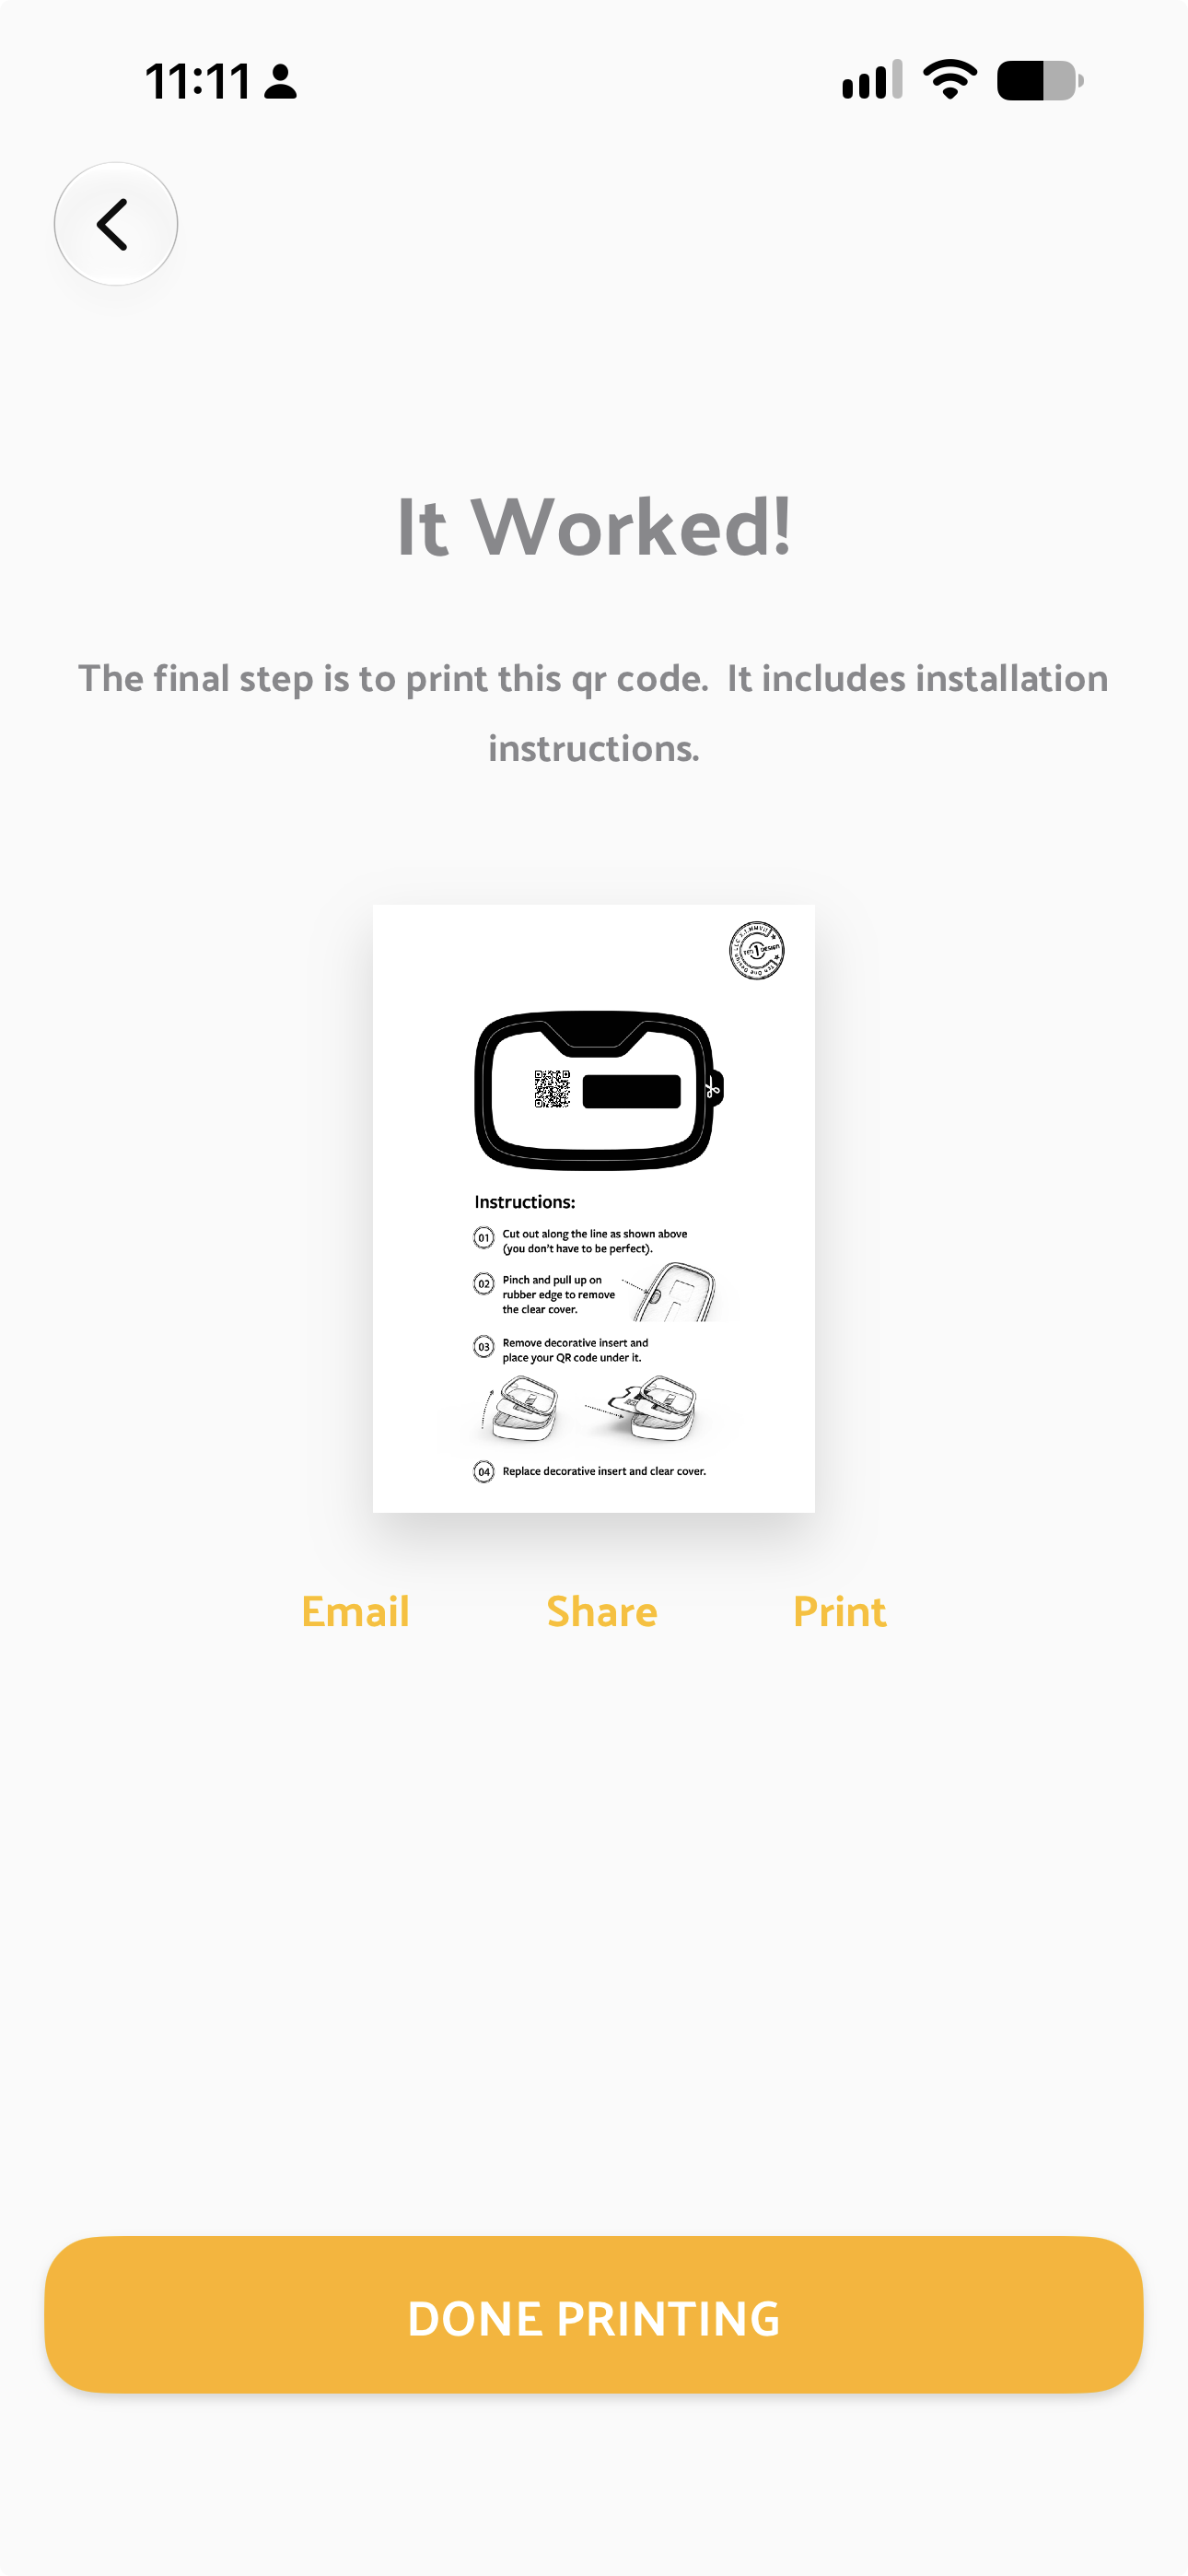
Screenshot: Step 12 — "It Worked!" print/share/email screen
✅ Setup complete. The final screen reminds you that any future changes — Wi-Fi password, branding, guest features — are made from the "Manage Porter Locations" button on the app's main screen or from portersetup.com/dashboard, not by reprogramming the device.
⚠️ Unlike local mode, there's no "test it" step in this flow. Scan the printed QR code yourself afterward to confirm the landing page loads and offers to join Wi-Fi.
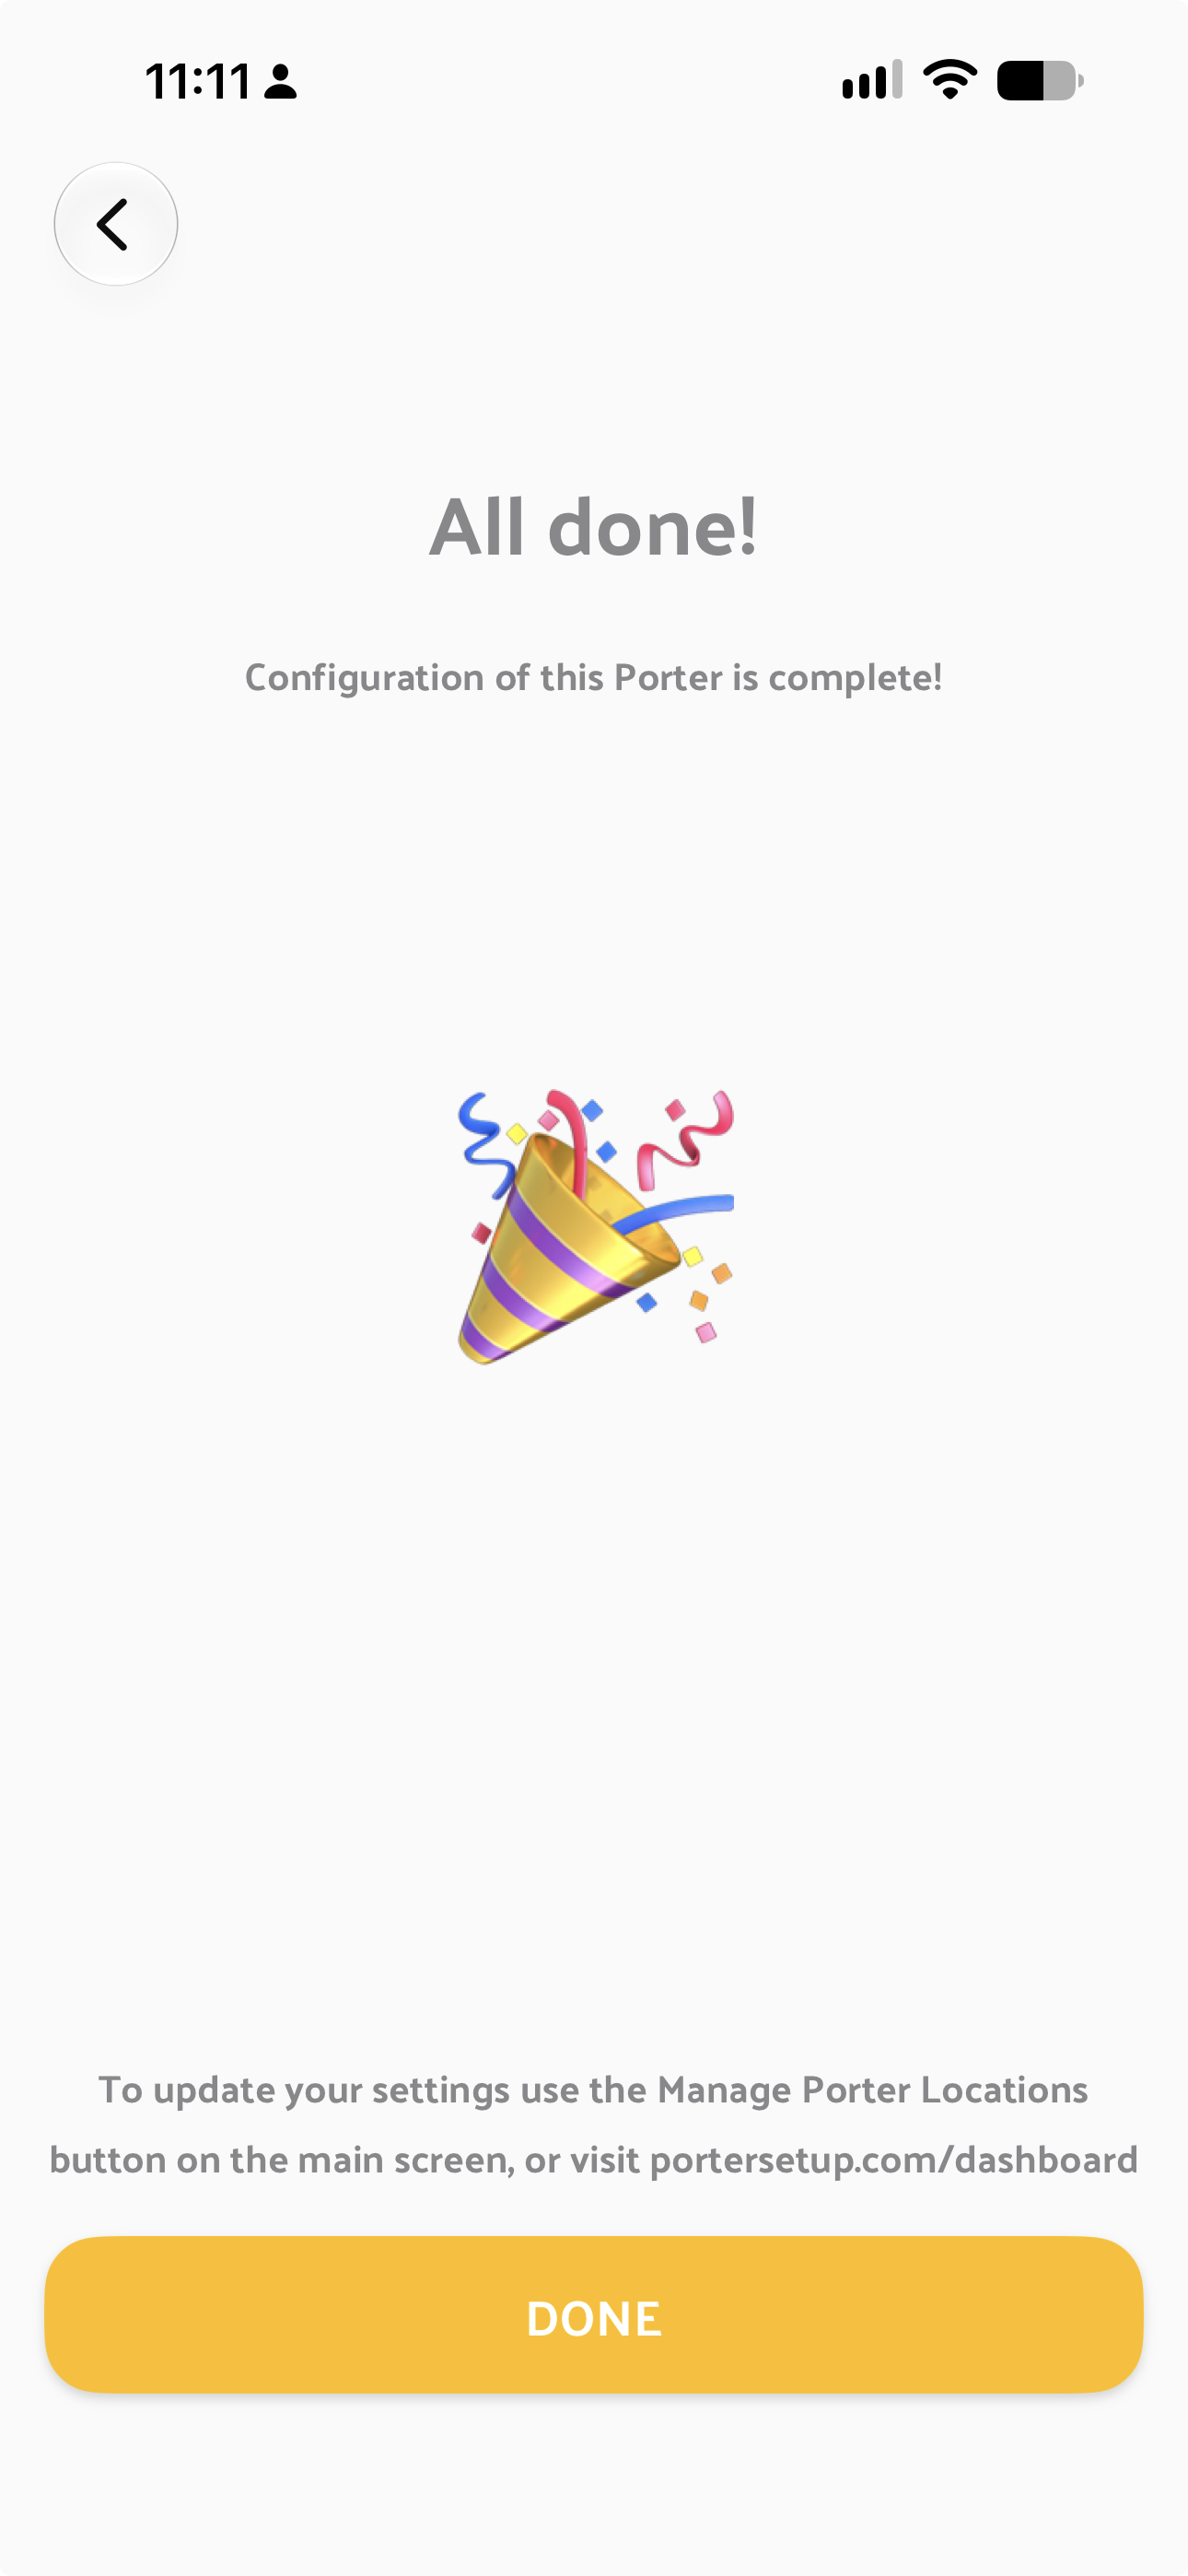
Screenshot: The "All done!" confirmation screen
Updating a Cloud-Managed Porter Later
Because everything lives on the Location, you can change the Wi-Fi password, branding, or QR message any time from the app or the dashboard — no need to physically reprogram the device.
Troubleshooting Tips
| Issue | Solution |
|---|---|
| QR code doesn't lead anywhere / landing page doesn't load | See QR Code or Tap-to-Join Won't Connect to Wi-Fi |
| Want guests to see a branded splash page and collect emails | See Do You Need a PHN Portal? — that's separate hardware from the Porter itself |
| "This Porter may be locked by a cloud account" | See Unlocking a Locked Wifi Porter |
Need Additional Help?
If you run into trouble during setup, contact our support team (info@tenonedesign.com) with the Porter's ID (found in the app's device list) and what you've already tried.
Manage this Location any time at portersetup.com/dashboard.
Was this article helpful?
That’s Great!
Thank you for your feedback
Sorry! We couldn't be helpful
Thank you for your feedback
Feedback sent
We appreciate your effort and will try to fix the article